- Home QZ
- Hanging and Fixing
- How to regrout tile when the old grout cracks
How to regrout tile when the old grout cracks
Learn how to regrout tile by cutting out cracked grout, cleaning the joints and packing in fresh material for a clean finish that lasts.
Guide by Milo Nussbaum
6 min of reading
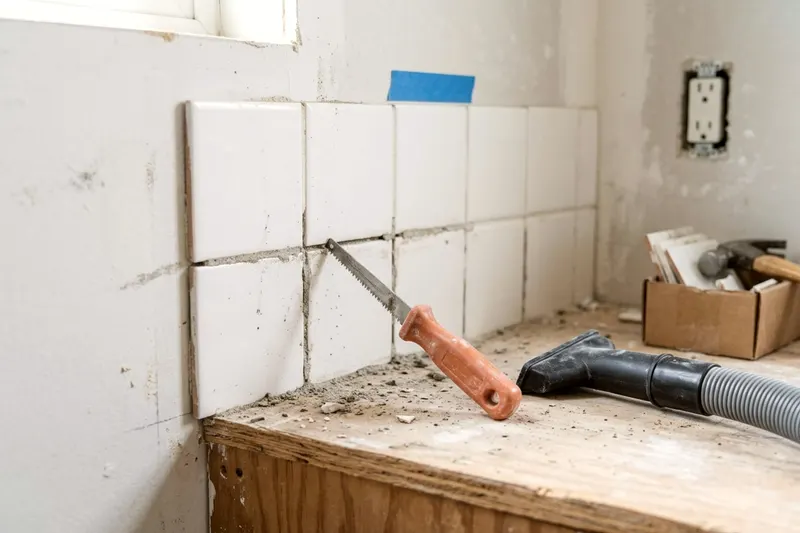
You can regrout tile to fix cracked lines and make a wall or floor look fresh. The job requires cutting out the old material, cleaning the empty joints and pressing in a new mix. A careful hand prevents tile damage and creates a solid finish.
Check whether the grout or the tile is the problem
If tiles are loose, regrouting is not the fix. Tap every tile near the cracked grout with the plastic handle of a screwdriver. A solid click means the tile is firm. A hollow thud means the tile has broken free from the adhesive.
Regrouting will not hold a loose tile in place. You must have the loose tiles reset before you fix the grout. Check the wall near a tub for soft spots. Press on the tiles to test the backing.
If the wall flexes, moisture may have damaged the drywall. Regrouting will not cure structural water damage. You must address the water damage to see when tile needs backer board.
Put on eye protection and a dust mask
Removing grout kicks up a lot of dust. A Dremel guide says grout removal can kick up a lot of dust. They recommend a dust mask and safety glasses. Put these on before you make the first cut.
This dust can carry serious health risks, so check the product and tool labels or ask a licensed pro about the right respirator. OSHA says respirable crystalline silica is created when cutting, grinding or drilling materials such as stone, concrete, brick and mortar.
OSHA says these particles are at least 100 times smaller than ordinary sand. Inhaling them raises the risk of silicosis, lung cancer, COPD and kidney disease.
Seal off the room. Close the door and open a window. Cover nearby furniture with plastic drop cloths.
Cut out the old grout without chipping tile edges
You can use a manual grout saw or a power tool. A manual saw works best for small patches. An oscillating multi-tool speeds up a whole floor. This is a tool worth owning for heavy home repairs.
Buy a carbide grit blade for your tool. Keep the blade centered in the joint. Turn the power tool on and lower it into the line.
Move the blade slowly along the gap. Work with a steady hand to avoid chipping the tile edges. A fast slip can scratch the glaze.
Remove the old grout deep enough that the fresh mix has room to grab the sides, using the depth your tool's instructions suggest.
Cut the vertical lines first on a wall. Switch to the horizontal lines after that. Pull the blade out gently when you reach a corner.
Brush and vacuum the joints clean
Clean out the lines completely. Debris left in the gaps will ruin your new finish. Dremel says to brush and vacuum the joints before regrouting. They note that new grout will not bond properly if dust remains.
Take a stiff nylon brush and scrub every open line. Push the bristles deep into the joints to loosen stuck powder. Sweep the heavy chunks into a dustpan.
Run a shop vacuum over the entire surface. Use a crevice attachment to suck fine dust from the deep grooves. Wipe a damp rag across the tiles to catch stray powder. Let the area dry completely.
Pick the right grout formula
Tile joints dictate the grout you buy. You can find the rules on a manufacturer technical sheet. Custom Building Products says its sanded grout fills joints from 1/8 to 1/2 inch. The same sheet says non-sanded grout may suit joints up to 1/8 inch.
Sanded grout contains fine silica sand for strength. The sand stops wide lines from shrinking and cracking as they dry. Non-sanded grout is smooth and sticky. It clings tightly inside narrow spaces without scratching delicate tiles.
Measure your joint width with a tape measure. Choose the right bag for that size.
Grout type | Joint width |
|---|---|
Non-sanded grout | Up to 1/8 inch |
Sanded grout | 1/8 to 1/2 inch |
Buy a bag of dry cement grout powder.
Mix and pack the fresh grout
Put on gloves, safety glasses and an N95 mask, as the grout maker advises, then pour the amount of clean water the bag specifies into a plastic bucket. Add the grout powder a little at a time. Stir the mix with a margin trowel until it feels like thick peanut butter.
Let the mix rest for the slake time on the bag. Then stir it once more without adding water.
Scoop a baseball-sized mound onto a rubber grout float. Press the float flat against the wall or floor. Smear the grout diagonally across the open joints.
Push hard to pack the gaps full. Packing the joints full is part of grouting floor tile cleanly. Moving at a diagonal angle stops the float edge from dipping into a joint.
A straight pass will scoop the wet mix right back out. Scrape off the heavy excess with the side of the float.
Sponge off the tiles and buff the haze
Wait for the grout to firm up in the joints. The package gives the wait time. Touch a joint lightly with a bare finger. You can start washing if no grout sticks to your skin.
Dip a large grout sponge in clean water. Wring it out until it is barely damp. Too much water can weaken the grout and cause color variation.
Wipe the sponge diagonally across the tiles in a wide circle. Do not press hard. Let the sponge glide over the surface. Flip the sponge over to a clean side after a few passes.
Rinse the sponge frequently in the bucket. Change the bucket water often. Dirty water just smears loose grout back over the tiles. You want the tiles mostly clean, but a cloudy film will remain.
A thin film of haze appears as the washed tiles dry. Wait for the surface to dry completely, then check the package for the haze wait time.
Rub the tiles with a dry microfiber cloth. Polish away the cloudy haze with firm circular motions. The tiles should shine once the haze is gone.
Keep foot traffic off a floor and water off a wall for as long as the grout package says. The mix needs time to harden into a solid block.
Use caulk at corners and changes of plane
Grout creates a rigid seal. Houses expand and contract with temperature changes. A rigid seal can crack in spots where walls meet.
Custom Building Products says cement grout is not for movement joints or changes of plane. The company says caulk or sealant should be used there.
Look at the inside corners of a room. Check the line where a wall meets a bathtub. Inspect the gap where floor tiles touch a baseboard. You must fill these changes of plane with flexible caulk.
Buy a tube of caulk matched to your grout color. Check your home center for caulk sold to match your grout color. Cut the plastic nozzle at an angle and squeeze a smooth bead into the corner. Smooth the caulk line with a wet finger.
Line up your next job
-
DIY wainscoting a beginner can put up in a weekend
Building DIY wainscoting adds character to a plain room in a single weekend when you follow these simple steps to measure, cut and paint.
-
Hanging peel and stick mirror tiles so they sit flat
Learn how to hang peel and stick mirror tiles on your wall so they sit perfectly flat, align straight and stay put and come down with care.
-
5 laminate floor problems you can fix yourself
You can handle common issues with this straightforward approach to laminate floor repair. Learn how to fix gapping joints, squeaks, and chipped planks.