7 steps to grouting floor tile cleanly
Learn the right way of grouting floor tiles to get strong joints and clean surfaces without leaving a messy haze on your new tile floor.
Guide by Nora Mattingly
5 min of reading
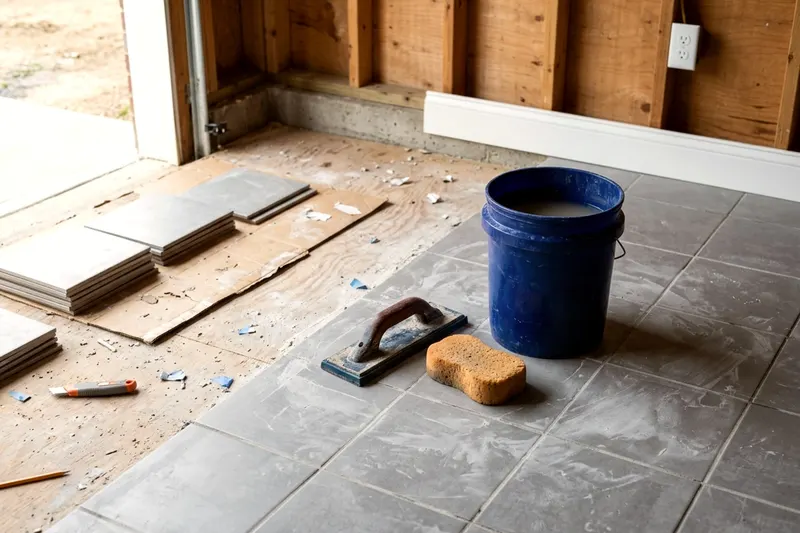
Grouting floor tiles locks the floor together and seals the gaps against dirt. You get clean lines by packing the joints tightly and wiping the excess away at exactly the right time. Put on safety glasses, waterproof gloves such as nitrile and an N95 mask before you open the bags of powder.
1. Let the thinset cure completely
Do not rush to fill the gaps between your new tiles. Custom Building Products says the tile setting material must cure at least 24 to 48 hours before cement grout goes on, unless you used a rapid setting mortar. Check the mortar packaging for the exact drying time and leave the room alone until that clock runs out.
If you cover the gaps too early, the moisture in the thinset under your tiles may not escape. Trapped moisture can weaken the bond to the floor or your cement backer board and may lead to loose tiles later. Walking on the floor too soon can shift the tiles.
Use this waiting period to clean the lines. Pull out every plastic tile spacer and scrape away any dried blobs of thinset sticking up between the tiles. Vacuum the floor thoroughly to empty the gaps so the fresh material has room to grab the tile edges.
2. Match the grout type to your joint width
The physical space between your tiles dictates the type of bag you buy. Measure the gap with a tape measure. Custom Building Products says its sanded grout fills joints from 1/8 to 1/2 inch. The sand helps the grout fill wider gaps.
The same data sheet says non-sanded grout may suit joints up to 1/8 inch. Unsanded powder is smoother and stickier. It works best for very tight lines where thick sand grains simply cannot fit.
Take a close look at your tile surface before choosing. Sanded grout can scratch some glass, metal, marble or stone tiles, so test a small area first. If your joints are 1/8 inch or less, non-sanded grout may be the safer pick for those tiles.
3. Mix a small batch and let it rest
Measure the clean water the bag calls for into a clean plastic bucket. Add the dry powder gradually to prevent dry clumps from sticking to the bottom. Stir the mixture with a margin trowel until it is smooth and free of lumps. You want it thick enough to hold its shape on the trowel, but wet enough to spread.
Stop mixing once the dry powder is fully blended. Custom Building Products says to let mixed grout stand for 5 minutes before remixing. The data sheet calls this pause slaking, so do not skip it.
Give the bucket one final stir after the five minutes are up. Do not add any more water, which can weaken the grout. Only mix enough material to use right away. The compound will start to harden in the bucket if you mix too much at once.
4. Pack the grout deep into the gaps
Scoop a heavy blob of the mixed compound onto the floor. Hold a rubber grout float in your dominant hand. Hold the float at a 45 degree angle and press it against the surface. Push the material across the tiles diagonally.
Forcing the rubber edge across the gaps at an angle pushes the compound deep into the joints. If you drag the float parallel to the lines, the edge will dig in and pull the wet material right back out. Work in a small section at a time.
The joints must be filled completely flush with the top edge of the tiles. Go over the same small section from two or three different directions. Firm, steady passes help pack each gap tight.
5. Strike off the heavy excess
Clear the bulk of the waste off the tile face before it starts to dry. Turn your rubber float on its long edge. Hold the edge of the float at a 90 degree angle to the floor.
Pull the hard rubber edge diagonally across the tiles like a squeegee. Moving at a diagonal angle prevents the float from dipping into the wet lines and dragging the fresh material out. Keep the pressure firm and steady.
Scrape the leftover compound into a small pile on the next dry section of floor. Scoop up the excess with your margin trowel and drop it back into your bucket if it is still wet. Wiping the bulk away now saves you from heavy scrubbing later.
6. Sponge the tiles clean in passes
Fill a second plastic bucket with clean water. Submerge a large, square tiling sponge. Wring the sponge out tightly until it is barely damp. Too much water can weaken the grout and cause color variation, so use as little as possible.
Wipe the damp sponge lightly across the floor in smooth circles to level the joints and lift the excess. Do not scrub hard, which can pull material out of the joints. Flip the sponge over in your hand and make a second pass with the clean side.
Rinse the sponge in the bucket immediately. Wring it tight again and repeat the process on the next row. The water in your bucket will turn cloudy very fast. Change the water often.
7. Buff off the haze and keep off the floor
A thin film of cloudy residue will dry on the tile surface as the floor moisture evaporates. The data sheet says grout haze can be removed after 3 hours.
Grab a piece of cheesecloth or a wrung out sponge and wipe it over the tiles to lift the dull film away. Work your way across the entire floor. If haze stays, the data sheet lists special haze cleaners for later, and says to test any cleaner in a hidden spot first.
Leave the room once the tiles are shiny and the joints look smooth. The same sheet says the floor should not take foot traffic until the grout has cured for 16 hours. Block the doorway with a heavy box or a chair. Walking on the tiles early will push dirt deep into the soft lines.
Handling corners and changes of plane
Do not use cement powder everywhere. Custom Building Products says cement grout is not for movement joints or changes of plane, where caulk or sealant should be used.
The corners where the floor meets the wall can shift slightly, and hard cement may crack under that pressure. The same rule applies where the tile floor meets a bathtub or a kitchen cabinet.
Buy a tube of flexible silicone caulk that matches your chosen floor color. Look for a caulk made to match your grout color. Run a smooth bead of caulk along the baseboards and inside any 90-degree corners instead of packing them with cement.
Line up your next job
-
When tile needs backer board and how to install it
Laying floor tile requires a rigid surface to prevent cracks, so tile backer board is a common base over a standard wood subfloor.
-
How to put up a peel and stick backsplash in an afternoon
Learn how to install peel and stick backsplash tile in one afternoon with steps for prepping the wall, cutting sheets and working around your kitchen outlets.
-
Which thinset mortar your tile job needs
Learn how to choose the right thinset tile mortar for your project and understand the differences between modified, unmodified and premixed mastic.