When tile needs backer board and how to install it
Laying floor tile requires a rigid surface to prevent cracks, so tile backer board is a common base over a standard wood subfloor.
Guide by Nora Mattingly
7 min of reading
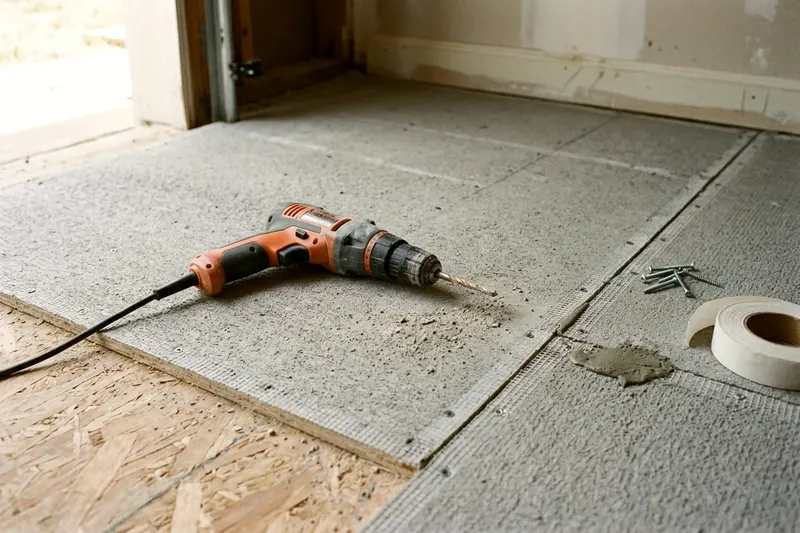
Floor tile goes over cement backer board rather than bare wood because tile and grout can crack if a wood floor bends. You install it by spreading thinset mortar on the subfloor, bedding the cement board into the wet mortar, and driving screws through the board to lock the layers together.
Why tile needs a stiff, stable base
Wood subfloors expand and contract with the seasons. They also bend slightly when you walk across the room. Ceramic and porcelain tiles barely flex. If the surface underneath moves, the rigid tile above it can pop loose.
A cement board helps limit that movement. It does not fix a badly uneven floor, so check the subfloor with a straightedge first. Grout is brittle, so any shift in the floor can crack the grout lines.
Adding a layer of backer board for floor tile stiffens the whole assembly. Your finished floor can then hold up better to foot traffic. Plywood alone can absorb moisture from the wet mortar used to set tile. This moisture makes the wood swell and warp while the mortar cures.
Cement board handles moisture without warping. It separates the tile from the wood beneath it.
Where you need backer board and where you may not
Plywood or oriented strand board subfloors usually need backer board or another approved tile underlayment, so check your tile and thinset instructions.
Tile can often go straight onto a rigid, flat concrete slab, but check the thinset maker's instructions. Just clean the concrete well and patch any large cracks before you start setting tile.
Older houses sometimes have subfloors made of solid wood planks. Cement board usually should not go directly over plank flooring. Screw a layer of plywood over the planks first, and check the board maker's subfloor requirements. You can then install the cement board over the plywood.
Standard drywall can crumble if it gets wet, so do not use it as a base for floor tile. Cement board resists moisture and does not rot, but check the maker's instructions before using it in a wet room, which needs extra steps to keep the framing dry.
Tools and materials for laying backer board
Gather your supplies in the room before you mix any mortar. Having everything close at hand stops the mortar from drying out. You do not want to search for a tool while the glue sets.
- Cement backer board sheets
- Modified thinset mortar in dry powder form
- Bucket and a drill with a mixing paddle
- A 1/4-inch square notch trowel
- Carbide scoring tool and a utility knife
- Alkali resistant glass fiber tape
- Backer board screws
Having a few basic hand tools makes this work much easier.
Check the subfloor and joist spacing first
Your wood subfloor must support the extra weight of cement board, mortar and tile. Walk heavily across the room and listen for squeaks. Sink extra wood screws into any loose spots. This secures the plywood to the joists.
Check the distance between the wooden joists under the floor. James Hardie says never to install cement board on joists spaced more than 24 inches on center. If your joists are farther apart, the floor may flex too much for tile. You would need a carpenter to reinforce the framing before you could safely lay tile.
Sweep the bare wood subfloor until no dust remains. Any dirt left behind will stop the mortar from bonding to the wood. Scrape away any blobs of old glue, paint or drywall mud. The wood must be bare and flat.
Measure the room and plan the layout
Plan your layout before you mix any mortar. You want to avoid four corners meeting at a single cross seam. Lay the boards out like bricks. Offset the joints in each row.
Never align the backer board seams with the plywood seams beneath them. Shift your starting board so its edges sit a few inches away from the subfloor joints.
James Hardie recommends 1/4-inch backer board on floors. A 1/4-inch board keeps the floor height down. Your new tile will meet the flooring in the next room more evenly.
Leave 1/8-inch gaps between board edges. Keep the board 1/8-inch back from walls. These gaps give the boards a little room to move.
Cut the boards to fit the space
Put on safety glasses and work gloves before you handle the material. Cement board dust irritates the eyes, so also wear a dust mask and check the maker's safety instructions. The cut edges are very sharp.
Measure the floor space. Mark your cut line on the face of the board with a pencil. Hold a metal straight edge on the pencil line. Pull a carbide scoring tool firmly along the straight edge a few times.
You want to cut through the fiberglass mesh just under the surface. Slide the board over a firm edge. Press down sharply on the overhanging piece. The board will snap cleanly along the scored line.
Use a utility knife to cut through the fiberglass mesh on the back of the board. You can now separate the pieces.
You may need to cut a round hole for a toilet flange or a floor vent. Drill a hole inside your marked circle.
Put a carbide abrasive blade in a jigsaw. Cut slowly along the pencil line. The dust will be heavy, so work outside if you can.
Set the board in thinset mortar
Once the dry boards are cut and laid out, pick up the first row. You need to bed the board into the wood with mortar. Picking the right thinset mortar helps the floor last. James Hardie says to set the board in a bed of modified thinset spread with a 1/4-inch square notch trowel.
Follow the thinset bag for how much water to use, then mix the powder in a clean bucket. Mix it with a drill paddle until it looks like thick peanut butter. Let the mortar rest for the time the bag gives. Mix it one more time before you use it.
Scoop the mortar onto the wood floor. Scrape the flat side of the trowel against the wood. This forces the mortar into the wood grain.
Flip the trowel around. Pull the notched side through the mortar at a slight angle. You want to leave straight, even ridges.
Press the cement board firmly into the wet ridges. Walk on the board to press it flat. The mortar fills any voids between the wood and the board. It stops the board from bouncing.
Fasten the board with the right screws
Fasten the board with screws soon after you set it, while the thinset mortar beneath it is still wet. Use special backer board screws. Check the board maker's list of approved fasteners and avoid regular drywall screws unless it allows them.
Follow the manufacturer guidelines for spacing the screws. James Hardie says to fasten the board every 8 inches, keeping fasteners 3/8 to 3/4-inch from edges and 2 inches from corners. Many brands print small dots on the board face. These show you exactly where to drive the screws.
Sink the screw heads perfectly flush with the board surface. If they stick up, the tile will rock on top of them. Driving screws cleanly takes a steady hand. Press hard on the back of the drill and stop just as the head sinks into the cement.
Do not drive the screws so deep that they break the fiberglass mesh. The mesh gives the board its strength. If you bury the screw too deep, drive another one right next to it.
Tape and fill the seams before you tile
The gaps you left between the boards need reinforcement. The taped seams make the floor act as a single solid piece. You do this with tape and mortar, much like finishing a drywall joint.
James Hardie says seams take 2-inch alkali resistant glass fiber tape. Standard drywall tape is not suitable. Cement mortar is alkaline, which is why the tape must be alkali resistant.
Roll the fiberglass mesh tape over all the flat seams. Press it down flat with your hand. Cut the tape with a utility knife at the end of each run. You do not need to tape the 1/8-inch gap where the board meets the wall.
Mix a small batch of modified thinset. Scoop some mortar onto a flat trowel or a wide putty knife. Pull the flat blade tightly over the taped seams. Force the thinset into the mesh and down into the 1/8-inch gap between the boards.
Scrape the surface flush with the board. You do not want a mound of mortar sitting over the seam. A lump will push your tile up and make the finished floor uneven.
Let the thinset cure as the bag directs. Sweep the floor one last time before you tile. You want to remove any loose crumbs of dried mortar.
Line up your next job
-
7 steps to grouting floor tile cleanly
Learn the right way of grouting floor tiles to get strong joints and clean surfaces without leaving a messy haze on your new tile floor.
-
How to put up a peel and stick backsplash in an afternoon
Learn how to install peel and stick backsplash tile in one afternoon with steps for prepping the wall, cutting sheets and working around your kitchen outlets.
-
Which thinset mortar your tile job needs
Learn how to choose the right thinset tile mortar for your project and understand the differences between modified, unmodified and premixed mastic.