- Home QZ
- Tool Basics
- How to drive screws with a drill without stripping them
How to drive screws with a drill without stripping them
Learn how to use power drill to screw without stripping the head or splitting the wood by choosing the right bit and setting the clutch correctly.
Guide by Milo Nussbaum
8 min of reading
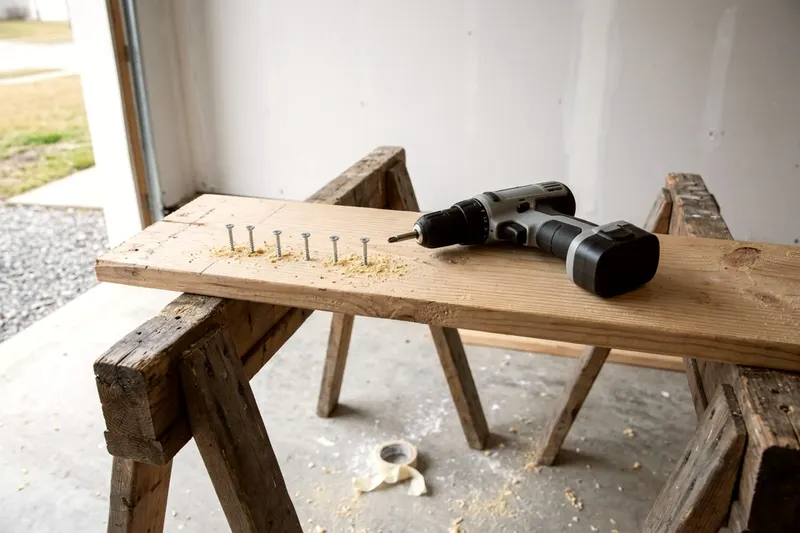
To drive a screw flush without stripping the head, you need a drill bit that fits the screw tightly and steady pressure directly behind the tool. A loose bit or a weak grip allows the metal to slip and chew up the screw head. Setting the drill clutch properly helps stop the spinning before the screw sinks too deep.
Get to know the controls on your drill
Put on safety glasses before you pick up a bit or drive a screw. A snapping screw or splintering wood sends fragments flying fast.
Keep your battery out or your cord unplugged while you learn the drill controls. OSHA warns not to carry a plugged in tool with a finger on the switch, to avoid accidental starting. Your drill has four main controls that matter for driving screws.
The chuck
The chuck is the front cylinder that holds the bit. You twist it counterclockwise to open the metal jaws. You twist it clockwise to clamp those jaws shut around the drill bit.
The clutch ring
Behind the chuck sits a rotating ring covered in numbers. This is the clutch. It controls how much twisting force the drill applies before it clicks and stops driving.
The speed switch
A sliding switch on top of the drill chooses the speed gear. Gear 1 spins slowly with high twisting strength, while gear 2 spins fast with less strength. Most drills work best in gear 1 for driving screws, since fast speeds can make the bit bounce out of the screw head. Check your manual for your model.
The direction button
A push button above the trigger on most drills sets the spinning direction, so check your manual for which side does what. Push it from the right side to spin the chuck clockwise and drive a screw. Push it from the left side to spin counterclockwise and remove a screw. Resting the button in the middle locks the trigger entirely.
Many big box store kits include an impact driver alongside a standard drill. This short tool lacks chuck jaws and uses rapid strikes to force large fasteners into heavy lumber. Put the impact driver aside for now. A standard drill with a clutch offers the gentle control a beginner needs for your first DIY job.
Match the drill bit to the screw head
A screw strips when the drill bit spins inside the head instead of turning the metal. This happens when the bit fits poorly. You must identify your screw type before you select a bit.
Drywall screws and standard wood screws usually take a cross shaped Phillips bit. Deck screws often take a star shaped Torx bit. Grab a handful of drill bits and test them in your screw before you load the drill.
- A small Phillips bit fits small cabinet hinges and delicate screws.
- A medium Phillips bit fits many household drywall screws and basic wood screws.
- A large Phillips bit fits thicker screws, so always test the fit.
Press your chosen bit deeply into the cross shape of the screw head. If the bit wobbles side to side, it is too small. A loose bit chews up the screw head quickly. Try the next size up.
Torx screws have a star pattern, while Robertson screws feature a square hole. These can grip better than traditional Phillips screws and are less likely to slip out. You still need to test the fit. A Torx bit must fill the star shape completely without rattling.
Take the battery out of your cordless drill. OSHA advises disconnecting power tools before changing accessories such as blades, bits and cutters. Slide your chosen bit into the open chuck. Twist the chuck clockwise until it clicks and holds the bit tight.
Using a magnetic bit holder makes the job easier. Clamp the holder into the chuck and slip short bits into its magnetic tip. The magnet holds the screw onto the bit. This leaves your free hand available to steady your work.
Set the clutch to stop the screw flush
The clutch ring stops the drill from driving a screw too deep. It prevents the bit from tearing up the screw head when the screw bottoms out. You want the screw head to sit perfectly flat with the wood surface.
Turn the ring to a low number near the start of the scale. A low setting delivers very little twisting force. Try driving a screw into a scrap piece of wood. The drill will make a loud clicking noise and stop spinning the bit long before the screw goes all the way in.
Turn the ring up a few numbers and try again. The drill drives the screw deeper before clicking. Keep increasing the number until you find the setting that sinks the screw head perfectly flush. Leave the ring on this number for the rest of your identical screws.
Different woods often need different clutch settings. Softer wood usually takes a lower number and harder wood a higher one. Test your setting on a hidden spot if you lack a scrap piece.
You can always drive a proud screw slightly deeper. A sunk screw can leave a dent that tears the top layer of grain. This torn grain catches the eye and ruins a smooth paint job. A perfectly flush screw head allows wood filler to sit flat across the surface.
Drill a pilot hole to stop wood splitting
Drill a pilot hole before driving thick wood screws. Thick wood screws push fibers apart as they enter. This pressure can split narrow trim boards when putting up DIY wainscoting and crack hardwood baseboard. A pilot hole removes wood from the screw path to relieve that outward pressure.
As a general guide, choose a drill bit slightly thinner than the solid metal core of your screw. Hold the drill bit up in front of the screw to check the size. You want to see the screw threads sticking out past the sides of the bit.
Secure your board before you drill. OSHA advises securing work with clamps or a vise so both hands are free to operate the tool. A spinning board can cause injuries and ruin your material. If you are building simple sawhorses, clamp the pieces to your workbench first.
On most drills, switch the gear to speed 2 for drilling. Turn the clutch ring past the numbers to the drill symbol. This locks the clutch so it delivers maximum power. It will not slip while making the hole.
Place the bit tip on the wood. Pull the trigger and push straight down into the material. Pull the spinning bit back out frequently to clear sawdust from the hole. A clogged hole can make the bit overheat and burn the wood.
Switch your drill back to gear 1 before you drive the screw. Turn your clutch ring away from the drill symbol and back to your chosen driving number. Forgetting to reset the clutch can lead to a stripped screw.
Hold the drill straight and press firmly
Body position and a simple wooden block keep the drill square to the board.
Position your shoulder directly behind the drill. Do not reach out to the side or stretch overhead. Your forearm should form a straight line with the drill body and the screw shaft. This straight line transfers your pushing force directly into the screw head.
Hold the drill grip firmly in your main hand. Place your open free hand on the back of the drill body. Pressing from the back keeps the bit locked tightly into the screw slots.
Stand a small wood block on its end on the board next to your drill. Its vertical edge helps you judge a 90-degree angle. Line the drill bit up against the vertical edge to stop the tool from wandering.
Start the drill very slowly. Watch the screw from two angles to keep it straight. Look down from the top and check the alignment from the side. Adjust your wrist to keep the drill perfectly in line with the screw.
If the screw tilts sideways, the bit will slip out of the head and strip the soft metal. Stop the drill immediately. Straighten the tool body and start again slowly.
You need steady, firm pressure as the screw goes deeper because the wood pushes back harder. A weak push allows the bit to bounce out of the screw head under load. This bouncing can ruin both bits and screws. Lean your body weight into the drill to maintain contact.
Fix a screw that starts to strip
Sometimes a screw strips despite a perfect setup. The bit slips, the metal grinds loudly and bright silver shavings appear around the screw head.
Stop pulling the trigger the exact second you hear that grinding noise. Continuing to spin a slipping bit ruins the screw head completely. You have a small window to save a stripping screw before it becomes permanently stuck.
Push the direction switch on the left side of the drill to put the tool in reverse. Press your body weight hard into the drill to seat the bit deeply into the damaged slots. Pull the trigger very slowly to back the screw out of the wood. A slow and forceful reverse often grips just enough undamaged metal to free the screw.
If the screw head is mildly stripped, lay a wide rubber band flat across the damaged metal. Press the drill bit firmly through the rubber band and into the screw. The rubber can fill gaps in the chewed slots and add friction. Reverse the drill slowly to try to free the screw.
Throw the damaged screw in the trash. Do not reuse a stripped screw, since the damaged head will likely slip again.
Check your drill bit for damage before grabbing a fresh screw. A slipping screw often chews up the metal edges on a Phillips bit. A damaged bit is likely to strip new screws. If the edges look round or chipped, throw the bit away and grab a fresh one.
A completely round screw head offers zero grip, so you must use a different tool. Grab a pair of metal locking pliers and clamp them tightly onto the exposed screw head. Twist the pliers counterclockwise. Once you break the friction, the screw usually backs out more easily.
Line up your next job
-
6 steps to a straight cut with a circular saw
Learn how to use an electric hand saw safely with these six basic steps. Set the blade depth, support the wood, and make a straight cut.
-
12 tools worth owning before your first DIY job
Finding out what tools I need to start a DIY project is the first step in home repair. Build a basic kit with these 12 hand and power tools.
-
DIY wainscoting a beginner can put up in a weekend
Building DIY wainscoting adds character to a plain room in a single weekend when you follow these simple steps to measure, cut and paint.