- Home QZ
- Tool Basics
- 6 steps to a straight cut with a circular saw
6 steps to a straight cut with a circular saw
Learn how to use an electric hand saw safely with these six basic steps. Set the blade depth, support the wood, and make a straight cut.
Guide by Milo Nussbaum
7 min of reading
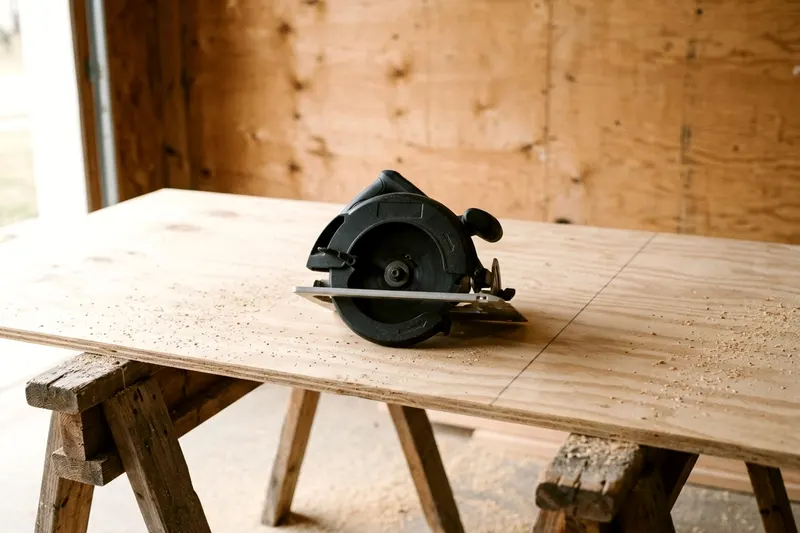
Make a straight cut by supporting the wood properly. Let the circular saw do the work. Set the blade depth a fraction of an inch below the material. Keep the base plate flat on the surface and guide the saw forward at a steady pace.
1. Put on eye and hearing protection before you plug in
Wear safety glasses and ear protection. A circular saw can throw sawdust and wood chips toward you. Saw noise can harm your hearing over time. Earplugs or protective earmuffs reduce it.
Keep a dust mask handy if you cut plywood indoors. Cutting plywood makes fine dust that can float in the air.
Clear your workspace before you handle the saw. Move tripping hazards away from your feet. Lay the power cord out so it will not catch on the wood. Keep the cord well away from your intended cut line.
Leave the saw unplugged while you set up your materials. Give yourself plenty of room to walk forward as you push the tool. Wear closed shoes to protect your feet from falling offcuts.
2. Check the guards and the blade before every use
OSHA advises disconnecting power tools before changing blades, bits or cutters. Keep the plug out of the wall while you inspect the tool. OSHA says portable circular saws with a blade over 2 inches in diameter must have guards at all times. OSHA describes an upper guard that covers the whole blade and a retractable lower guard that covers the teeth except where they meet the work.
Push the lower guard back with your thumb and let it go. OSHA says the lower guard must return automatically to cover the blade when the tool is withdrawn from the work.
Wood sap and sawdust can make the guard stick. Clean the guard pivot with a dry brush if it hesitates, and do not use the saw until the lower guard snaps back on its own. Never wedge the guard open with a block of wood or a zip tie.
Check the trigger mechanism. OSHA says circular saws with a blade over 2 inches must have a constant pressure switch that cuts power when released. Squeeze the trigger to make sure it springs back fast. Inspect the blade for missing teeth.
Spin the blade slowly by hand to ensure it moves freely without scraping the metal housing. Check that the blade is mounted the way your saw's manual shows.
3. Set the blade depth just below the board
Rest the unplugged saw on the edge of your 2x4 or plywood. Loosen the depth adjustment lever on the motor housing. Lift the saw handle to drop the blade past the base plate.
Lower the blade until the lowest tooth sits just below the bottom of the wood. Push the lever down to lock the depth firmly.
Too much blade hanging below the wood can cause extra friction and make the saw harder to push through the cut.
Exposing more teeth can also increase the risk of a dangerous kickback. Kickback happens when the wood pinches the blade and throws the saw backward. Keep the blade shallow to minimize the danger.
A shallow blade setting can also help give a cleaner cut on the top surface.
Double check your depth setting every time you switch from cutting thin plywood to thick framing lumber. Setting the depth correctly helps keep your work clean and keeps risk down.
4. Support the board so the offcut falls free
Place the wood on a sturdy surface. You can build a pair of simple sawhorses from 2x4 lumber to hold your materials.
Clamp the main part of the board down to the sawhorses. The board must not shift as you push the heavy saw across it. Let the piece you plan to cut off hang over the edge into empty space.
Do not let the board sag or shift as you cut.
A sagging board can pinch the blade, and a pinched blade can make the saw jump backward toward you. Check your saw's manual for how to support the work.
If you are cutting a long, heavy piece of lumber, ask a helper to steady the waste end and keep both of your hands on the saw. Let the weight drop naturally as the cut finishes.
Keep your feet clear of the drop zone. Proper support helps keep the blade from getting stuck and the cut straight.
5. Mark a line and guide the saw along it
Use a framing square to draw a straight pencil line across the board. Mark a clear line from the near edge to the far edge. Plug the saw into the wall socket.
Rest the front edge of the metal base plate on the wood. Line up the guide notch on the front of the base plate with your pencil line. Keep the blade clear of the board and your finger off the trigger until you are lined up.
Squeeze the trigger and wait. Let the motor reach full speed before the blade touches the wood. Pushing a slow blade into the wood can cause it to jam. Push the saw forward steadily once the motor hums evenly.
Follow the pencil line using the guide notch. Keep your eyes on the guide notch, not on the spinning teeth. Do not force the tool forward. Pushing too hard can strain the motor.
The saw blade has a thickness called the kerf. The kerf removes a small amount of wood as sawdust. Line up the blade so it cuts on the waste side of your pencil line.
If you cut straight down the middle of the line, your final piece will be too short. Let the sharp teeth do the hard work. Keep both hands on the saw grips to maintain a steady line.
6. Let the blade stop before you lift the saw
Keep the base plate flat against the wood as you finish the cut. Push the saw smoothly through the final inch of the board. The waste piece will fall away to the ground.
Release the trigger the exact moment the blade clears the wood. Do not twist the saw at the end of the cut. Twisting the blade against the cut edge can damage the wood.
Hold the saw completely still and wait. The heavy metal blade takes a moment to spin down after you release the trigger. Lift the saw away from the board only after the blade comes to a complete halt.
Lifting a spinning blade risks catching the cut edge and throwing splinters into the air. Let the tool stop on its own.
Set the saw down safely. Place it on its side or set it down flat on a workbench. Make sure the lower guard has snapped shut to cover the teeth.
Never set a spinning saw down on the floor. The exposed teeth can catch the floor and drag the tool away.
What to do if the blade binds in the wood
Sometimes the wood pinches the blade mid-cut. The motor noise drops to a low growl, and the saw stops moving forward. Stop pressing forward immediately.
Release the trigger. Hold the saw steady and let the blade stop completely. Unplug the saw from the wall.
Pull the tool backward out of the cut track. Check the blade for bent teeth or damage. Look at your wood support. Binding often means the board is sagging and squeezing the blade.
Adjust your clamps and sawhorses to keep the wood flat. You might need to add a support closer to the cut line. Check the cord to make sure it did not snag on a corner.
Plug the saw back in. Put the blade back in the groove you just cut. Leave a little empty space between the teeth and the uncut wood. Never start the saw with the teeth touching the wood.
Squeeze the trigger and let the motor reach full speed. Push forward gently to resume your cut. Follow the same line and let the tool set the pace.
Cutting full sheets of plywood on the ground
Cutting a large sheet of plywood on sawhorses is awkward. The heavy sheet can sag as you cut. Place a sheet of rigid foam insulation flat on the floor or the driveway.
Lay your plywood directly on top of the foam. The foam board supports the entire sheet evenly and prevents it from bowing.
Set your saw blade depth so it cuts through the plywood and just scores the foam. Draw your cut line across the plywood.
Clamp a long straight board parallel to your cut line. Measure the distance from the saw blade to the edge of the metal base plate. Offset your straight board by that exact distance.
Run the side of the base plate against the clamped board. The clamped board acts as a physical fence for the saw. Keep steady sideways pressure against the guide as you push forward.
Walk alongside the cut as you move the saw. Cutting on foam helps keep the waste piece flat. This method can give long straight cuts with less risk of the blade binding.
Line up your next job
-
How to drive screws with a drill without stripping them
Learn how to use power drill to screw without stripping the head or splitting the wood by choosing the right bit and setting the clutch correctly.
-
12 tools worth owning before your first DIY job
Finding out what tools I need to start a DIY project is the first step in home repair. Build a basic kit with these 12 hand and power tools.
-
DIY wainscoting a beginner can put up in a weekend
Building DIY wainscoting adds character to a plain room in a single weekend when you follow these simple steps to measure, cut and paint.