Which thinset mortar your tile job needs
Learn how to choose the right thinset tile mortar for your project and understand the differences between modified, unmodified and premixed mastic.
Guide by Nora Mattingly
7 min of reading
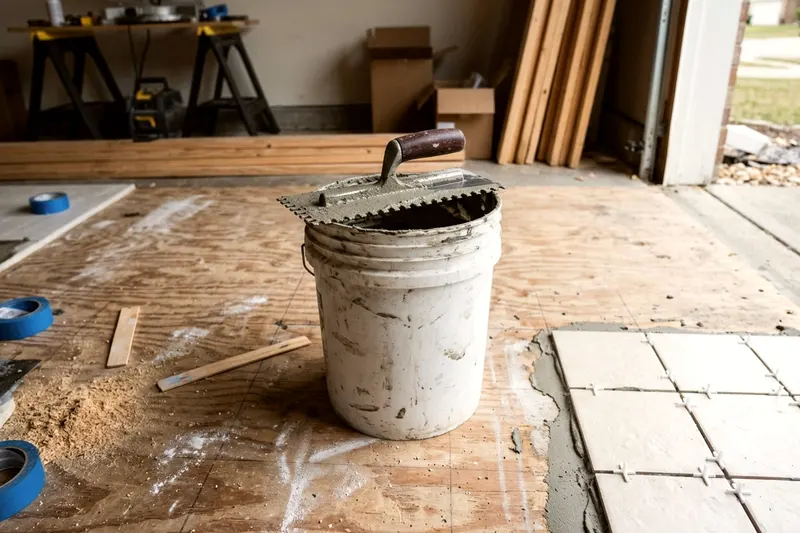
A modified thinset tile mortar suits many home tiling projects. The added polymers help the cement grip your tiles firmly. You just add water, mix the powder to a thick paste and spread it over your subfloor or wall.
How thinset creates a solid base under tile
Thinset acts as the permanent bridge between your tile and the surface underneath. It fills the tiny gaps in both materials. The cement base cures hard to lock the tile down. This solid bed supports the ceramic or stone from below.
A tile over an empty gap snaps when you step on it. Thinset fills that space completely so the tile can support heavy weight.
Wood expands and contracts with changes in temperature and humidity. Polymer modified thinset allows slight movement. Thinset cannot fix a floor that flexes, so the subfloor must be stiff before you tile.
Choose between modified mortar, unmodified mortar and tile mastic
The tile aisle in a big box store holds three main adhesive options. The shelves display bags of modified thinset, bags of unmodified thinset and buckets of tile mastic.
Modified thinset contains cement, sand and powdered plastic polymers. These polymers increase the bond strength. They also help the mortar hold onto water longer.
A slower dry time can help the cement cure well. Many home jobs use a modified thinset, so check the bag for the surfaces it is approved for.
Unmodified thinset contains only Portland cement and sand. You mix it with water. It has no added polymers, so check the bag for what it suits.
Use unmodified mortar when the tile, membrane or backer board maker calls for it.
Tile mastic comes wet in a bucket. This is an organic glue and not a true cement mortar. Mastic is sometimes used on dry wall areas such as a kitchen backsplash if the label allows it.
You scoop it out and use it right away. Many mastics are not made for wet areas, so check the label before using one on a floor or in a shower.
Read the standard ratings on the paper bag
Manufacturers print ANSI codes on their bags to tell you what the powder does. These codes show the mortar passes specific industry tests. Custom Building Products describes VersaBond Professional as a polymer modified mortar that exceeds ANSI A118.4 and A118.11. Check the data sheet for the surfaces and tile types it is approved for.
Read the bag before you buy it. The print must list the exact materials you plan to glue together. A mortar might suit ceramic but not glass. Find a bag that lists your exact tile type.
A solid surface must be ready before you mix anything. If your floor bounces, the mortar can crack. You may need to add plywood and install backer board to make a stiff floor.
The thinset sticks best to a clean surface. A damp sponge wipes away all the dust after you sweep the floor.
Pick a notched trowel to match your tile
A notched metal trowel spreads the thinset mortar. The flat side pushes the wet cement into the floor. The notched side combs the cement into even ridges.
The tile presses into these ridges. The ridges collapse and cover the back of the tile completely.
Small tiles need short ridges. Large tiles need tall ridges. The trowel notches determine the ridge height. A trowel with 1/4 by 1/4 by 1/4-inch square notches leaves short lines of mortar.
Larger tiles need more cement underneath to sit flat, so follow the tile and mortar makers' trowel advice. A trowel with 1/4 by 3/8 by 1/4-inch square notches leaves taller ridges.
Large and heavy tiles call for a mortar made for them.
Custom Building Products says its large and heavy tile mortars can be applied up to 3/4-inch thick. Look for a mortar made for large and heavy tile if you are laying large stone or wide ceramic formats.
Figure out how many bags to buy
Your trowel size changes how far a bag of mortar goes. Taller ridges use more wet cement per square foot. You buy thinset tile mortar in dry bags. Look at your room size and your trowel size to count your bags.
Calculate your floor area in square feet. Multiply the room length by the room width. Check the coverage listed on the mortar bag.
Divide your total floor space by the coverage number. Buy one extra bag to cover spills and mistakes. Store unopened bags dry, as the bag directs.
Trowel notch size | VersaBond Professional coverage per 50 lb bag |
|---|---|
1/4 by 1/4 by 1/4-inch square notch | 85 to 95 square feet |
1/4 by 3/8 by 1/4-inch square notch | 60 to 67 square feet |
These numbers are for VersaBond Professional and give you a starting point, because coverage varies with installation practices and jobsite conditions. Custom Building Products lists 85 to 95 square feet of coverage per 50 lb bag of VersaBond Professional with a 1/4 by 1/4 by 1/4-inch square notch trowel. With a 1/4 by 3/8 by 1/4-inch square notch trowel, the same 50 lb bag covers 60 to 67 square feet.
Mix the thinset and let it rest
Safety glasses and a dust mask go on your face before the first bag opens. The dry powder makes dust you should not breathe, so read the safety warnings on the bag.
A clean plastic bucket and a heavy duty drill with a mixing paddle make the job easy. Measured water goes into the empty bucket first. The bag tells you the exact amount of water to use.
The water receives the dry powder next. If you put the powder in first, dry clumps stick to the bottom of the bucket.
Run the drill slowly to spin the paddle through the heavy mix. Keep the speed low. Fast mixing can whip air into the mix. Stop mixing when the mortar looks like thick peanut butter.
Mix only half a bag at a time. Mortar hardens in the bucket after the time listed on the bag. This time limit is called the pot life. A half bag gives a beginner enough time to work without rushing.
The wet mortar needs to sit undisturbed. The industry calls this resting period slaking. The water needs a few minutes to soak into the dry polymers. Read the bag for the exact slake time.
Remix the mortar briefly after it slakes. Do not add any more water. The thinset is ready to use.
Spread the mortar before it skins over
Your trowel scoops the wet mortar out of the bucket. Smear the cement flat against the floor or wall. Comb the mortar with the notched edge held at an angle.
Drag the trowel in straight lines. Do not make swirls or curved lines. Straight ridges allow the air to escape when you press the tile down.
Only spread as much thinset as you can cover before it skins, using the open time on the bag. If the wet cement sits too long, the surface dries out. This dry layer is called a skin.
A skinned surface feels dry to the touch and will not grab your tile. Scrape the mortar off the floor and throw it away if it skins over. Spread fresh mortar from the bucket.
Back-butter large tiles for a stronger hold
Large tiles need extra help to stick to the floor. You wipe a thin layer of wet mortar across the back of the tile before you set it. Tile setters call this step back-buttering.
The flat side of your trowel presses a thin coat of thinset into the back of the tile. You do not need to comb ridges on the ceramic. The flat coat fills the small pores in the tile body. When you drop the tile onto the combed floor ridges, the two layers of wet cement bond together.
The tile presses into the fresh floor ridges. Push down and wiggle the tile slightly perpendicular to the ridge lines. This motion collapses the ridges and presses the air out.
Pick up the first tile you set to check your work. The back of the tile should be completely covered in wet cement. If you see bare spots, switch to a trowel with larger notches.
The floor needs time to harden, so follow the bag for foot traffic and grouting times. Stay off the new tile until the mortar cures completely. Walking on a wet floor pushes the tiles out of place. Once the cement base feels solid, you can start grouting the floor tile.
A garden hose washes your tools and bucket outside before the leftover mortar turns to stone. Do not wash thinset down a sink drain, because cement can settle in the pipes and clog them.
Line up your next job
-
7 steps to grouting floor tile cleanly
Learn the right way of grouting floor tiles to get strong joints and clean surfaces without leaving a messy haze on your new tile floor.
-
When tile needs backer board and how to install it
Laying floor tile requires a rigid surface to prevent cracks, so tile backer board is a common base over a standard wood subfloor.
-
How to put up a peel and stick backsplash in an afternoon
Learn how to install peel and stick backsplash tile in one afternoon with steps for prepping the wall, cutting sheets and working around your kitchen outlets.