How to put up a peel and stick backsplash in an afternoon
Learn how to install peel and stick backsplash tile in one afternoon with steps for prepping the wall, cutting sheets and working around your kitchen outlets.
Guide by Nora Mattingly
6 min of reading
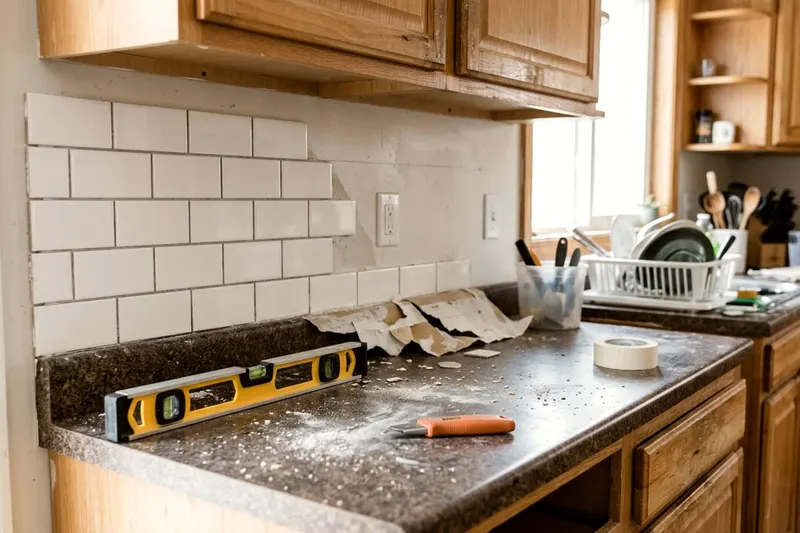
A peel and stick backsplash tile project gives your kitchen a fresh look in a single afternoon. This is one of the easier DIY projects for beginners to tackle. Prep the surface thoroughly and plan the layout from the counter upward. Cut the sheets to fit and press them firmly into place.
Check the wall is smooth, clean and dry
Wash the wall with a mix of dish soap and warm water. Scrub the area above the stove and the sink. Grease stops the adhesive from bonding. A degreaser can help with heavy stains, so follow its label for gloves and ventilation.
Wipe the wall with a damp cloth to remove any soap residue. Fill any dents or holes in the drywall with spackle. Sand the spackle smooth once it dries. Wipe the dust away with a clean rag.
The surface must be completely dry before you start. Let the wall dry for a few hours. Open a window to speed up the drying process.
Fresh paint requires a waiting period. Smart Tiles asks for at least three weeks between the last coat of paint and installing the tiles. This gives the paint time to cure. Curing prevents the tiles from pulling the paint off the drywall later.
Check your thermostat before beginning. Smart Tiles says the tiles and room should be between 65 and 95 degrees Fahrenheit during installation.
Cold walls make the adhesive stiff. Stiff adhesive may not grip the drywall. Turn the heat up if the room is too cold and wait for the walls to warm up.
Turn off power and remove outlet covers
Turn off the kitchen circuit at the breaker box. Plug a lamp into each outlet to check the power is off, and call a licensed electrician if you are unsure. Flip the light switches to ensure the overhead lights are off. Leave the breaker off until the project is finished.
Unscrew the faceplates from every outlet and switch on the backsplash wall. Put the screws and plates in a bowl. This keeps them from getting lost.
Clean the wall around the electrical boxes carefully. Use an old toothbrush to sweep dust out of the corners. Wipe the area with a damp rag and let the spots dry completely.
You will tile right up to the edges of the electrical boxes. The outlet covers will hide the cut edges of your peel and stick wall tiles later. Do not tile over the screw holes. The plastic plates need to sit flush against the wall.
Plan the layout from the counter up
Measure the width and height of the wall in inches. Write the numbers down. Multiply the width by the height to find the total square inches. Divide that number by 144 to get the square feet.
Buy extra tile beyond what your square footage requires. The extra sheets cover mistakes and odd cuts around cabinets.
Start your layout at the bottom corner of the most visible wall. Rest the bottom edge of the first tile on the counter. The counter gives you a straight line to follow.
Some counters are not perfectly level. Place a bubble level on the counter to check it. Draw a level pencil line directly on the wall if the counter slopes. Follow the pencil line instead of the counter.
Dry fit a few sheets on the table to see how they connect. Shift the starting point left or right on the wall to balance the cuts. You want to avoid leaving a tiny sliver of tile at either end.
Check the manufacturer directions to see which side goes up. Orient the overlapping edges away from the main entrance of the kitchen. This makes the seams less visible.
Cut sheets with a utility knife and straightedge
Gather a sharp utility knife, a metal ruler and a cutting mat. You only need a few basic hand tools for this step. A cork-backed metal ruler works best. The cork stops the ruler from sliding on the smooth tile surface.
Put on safety glasses before you make the first cut. Place the cutting mat on the kitchen table. Lay the tile sheet face up on the mat.
Measure the gap on the wall with a tape measure. Mark the measurement on the front of the tile with a pencil. Line the metal straightedge up with your marks.
Press the straightedge down firmly with your non-dominant hand. Hold the utility knife in your dominant hand. Score the front of the tile along the straightedge. Make a light first pass to create a groove.
Keep the blade against the metal edge. Press harder on the second and third passes to cut completely through the sheet.
Change the knife blade after every few cuts. A dull blade tears the top layer of the tile. A sharp blade leaves a clean edge. Keep your fingers clear of the cutting path.
Peel, place and press from the center out
The adhesive on the back of the sheets is very strong. The tile will stick instantly if it touches the wall. Peel the backing paper halfway down from the top edge of the tile.
Hold the sheet by the edges. Keep the exposed adhesive away from the drywall. Align the bottom of the tile with the counter or the row below it. Check that the side edge lines up with your starting mark.
Press the bottom edge against the wall once the alignment is right. Smooth the tile upward with your hand. Pull the rest of the backing paper away as you go.
Press from the center out to the edges. Pushing outward forces trapped air bubbles out from under the sheet. Run a plastic smoothing tool over the entire tile. A clean paint stirrer or a credit card also works.
Apply firm pressure across the whole surface. The adhesive needs pressure to bond properly with the wall. Pay extra attention to the corners and overlapping seams.
Check each seam with your finger. Press down any lifted edges immediately before the adhesive sets.
Keep tiles clear of the range and other heat
Peel and stick adhesive softens when it gets too hot. Smart Tiles says its peel and stick tiles should not be exposed to temperatures above 120 degrees Fahrenheit. The tiles may peel off the wall and warp if they get too warm.
You must protect the installation from the stove and small appliances. Measure the space behind your stove. Smart Tiles says that behind a stove without a protective panel or metal cover, an 8-inch space should be left without tiles.
If you want that gap covered, use a protective panel or metal cover and check the tile maker's instructions for how to fit it. Also check your range manual for clearances.
Move small appliances forward on the counter. Smart Tiles says to keep the tiles at least 2 inches from a heat source such as a toaster oven.
Pulling the toaster away from the wall can protect the adhesive from heat. Keep other small appliances that give off heat pulled forward while they run.
Trim around outlets and finish the edges
Outlets and light switches require careful measuring. Hold a sheet of tile over the electrical box. Mark the four corners of the box on the tile with a pencil.
Place the tile on your cutting mat. Use the straightedge and utility knife to cut out the rectangle. Take your time on the corners. Overcut the corners slightly so the inner piece pops out cleanly.
Cut the hole slightly larger than the electrical box. The plastic outlet cover needs room to sit flat against the drywall. Peel the backing off and press the trimmed sheet onto the wall.
Screw the outlet cover back into place. Turn the breaker back on once all the covers are installed. Test the lamp to ensure the power is working.
Finish any exposed outside edges with peel and stick edge trim. You will find edge trim in the tile aisle at the big box store. Measure the height of the exposed edge. Cut the trim to length with your utility knife.
Peel the backing off and press the trim over the raw edge of the tile. Press the trim against the wall to hide the bare drywall.
Line up your next job
-
7 steps to grouting floor tile cleanly
Learn the right way of grouting floor tiles to get strong joints and clean surfaces without leaving a messy haze on your new tile floor.
-
When tile needs backer board and how to install it
Laying floor tile requires a rigid surface to prevent cracks, so tile backer board is a common base over a standard wood subfloor.
-
Which thinset mortar your tile job needs
Learn how to choose the right thinset tile mortar for your project and understand the differences between modified, unmodified and premixed mastic.