- Home QZ
- Hanging and Fixing
- 5 laminate floor problems you can fix yourself
5 laminate floor problems you can fix yourself
You can handle common issues with this straightforward approach to laminate floor repair. Learn how to fix gapping joints, squeaks, and chipped planks.
Guide by Milo Nussbaum
5 min of reading
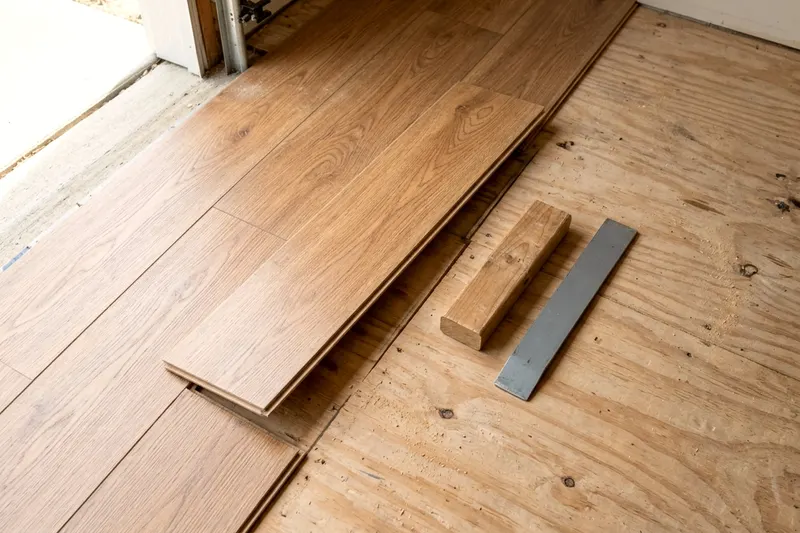
Laminate floor repair usually means fixing small damage like gaps, squeaks, and chips. You can handle these common problems with a few simple tools and a free afternoon. Fix the underlying movement first to keep the floor sitting flat.
1. Find why the floor is moving before you fix it
Laminate floors float over the wood or concrete subfloor. Mohawk says its laminate suits climate controlled indoor rooms at 35 to 65 percent relative humidity and 60 to 85 degrees Fahrenheit. Planks expand in warm, humid air and shrink when the room turns cool. This constant movement is normal.
The problems start when the expanding boards hit a wall and have nowhere to go. Mohawk's instructions call for a 3/8-inch expansion space on all sides of the floor. Take a pry bar and pull off the baseboards carefully to check this gap. Look for spots where the wood touches the drywall.
Put on safety glasses before making any cuts. Use an oscillating multi-tool to cut back any planks that touch the wall and restore the 3/8-inch gap.
Fasteners also cause trouble. Mohawk says floor movement must not be constrained by glue, nails, screws, hardware or other fixed obstructions. Remove any stray nails driven through the planks so the boards can slide freely.
2. Close a gapping joint with a tapping block
Planks slide apart when the locking mechanism loses its grip. This leaves a wide gap between boards that traps heavy dirt. Gaps also expose the vulnerable bare edges to water from mopping. You can push the boards back together without tearing up the whole room.
Take your shop vacuum and clean the gap thoroughly to pull out any grit. Dirt trapped in the joint stops the boards from locking tight. Grab a tapping block and a heavy rubber mallet. Choose a block made specifically for laminate flooring.
A proper block fits the edge of the plank safely without crushing the lip. Place the tapping block flat against the end of the loose board. Hit the block firmly with the mallet to drive the plank forward. Stop hitting when the joint closes tight.
Check the baseboard at the other end of the room. Make sure you maintained the 3/8-inch expansion space. If you moved the whole row too far, you must cut the end plank.
3. Quiet a squeak or a soft spot
Floors often squeak when planks rub against each other. This friction often happens when boards lack a proper expansion space at the walls. Check the room edges and trim any tight spots first.
If the expansion space is clear, the noise usually comes from an uneven subfloor. Planks bend when you step on a soft spot where the subfloor dips low. This forces the tight joints to grind and pop. You can fix minor dips by injecting a liquid floor repair adhesive.
You do not need to pull up the planks for small soft spots. Buy a laminate floor repair kit that includes a heavy syringe and the liquid adhesive, and check that the flooring maker allows it, since glue can hold a floating floor in place. Find the exact spot that squeaks when you step on it. Mark the board with painter's tape.
Take a power drill and the small drill bit the kit calls for. Drill a small hole directly through the squeaky plank. Keep the drill straight to avoid snapping the small bit. Squeeze the liquid adhesive into the hole until the void underneath fills up completely.
Wipe up any extra glue with a damp rag. Place a heavy stack of books on the board and wait for the adhesive to cure as the kit directs.
4. Flatten swollen plank edges after a spill
Laminate absorbs sitting water through the seams between boards. The compressed wood core drinks the moisture rapidly and swells up. This lifts the edges of the plank and ruins the smooth surface of your floor. Act quickly when you spot water damage.
Small bumps sometimes shrink back down as the core dries out. Set up a heavy floor fan. Blow warm air directly across the damp floor. Wait a few days to see if the swelling drops on its own.
A swollen core rarely shrinks back perfectly flat. You can try pressing a minor bump down while it dries. Cover the dry plank with a clean cloth. Set a heavy box over the joint and leave it while the floor dries.
Check the board once you remove the box. Often, the edge stays raised and the core remains soft. You simply have to swap out the swollen plank when this happens. Never sand a swollen laminate floor.
Sanding strips off the printed wear layer. It leaves an ugly bald spot that you cannot fix.
5. Fill chips and swap out badly damaged planks
Small chips and deep scratches stand out on a smooth floor. You can fill small spots with a hard wax laminate repair kit. Take the heated melting tool from the kit. Melt a mix of colored wax blocks to match your floor pattern.
Drip the hot wax straight into the scratch until it overflows slightly. Take the plastic scraper tool. Scrape the top flat and let the wax cool.
A large hole or a badly swollen edge means replacing the board entirely. You cannot fill a massive crater with wax. Take a circular saw and set the depth to match the plank thickness. You need a straight cut straight down the middle to free the inner core.
Cut a smaller diagonal line from the center cut to each corner of the plank. Pull the broken pieces out of the floor with pliers. Vacuum the empty hole. Cut the bottom groove lip off your new replacement board with a utility knife.
Removing the lip lets you drop the board straight down instead of sliding it. Apply wood glue to the tongues of the surrounding planks on the floor. Press the new board down into the hole. Put a heavy weight on the board overnight.
When to replace the whole floor
A major flood can ruin the core of the boards. Laminate planks often bubble and warp after sitting under standing water. You will usually need to tear up the floor if a pipe bursts.
Subfloor water damage requires a professional. They must dry the wood properly before you lay anything new. Widespread scratching also means it is time for a new floor. The clear wear layer protects the printed wood pattern from daily foot traffic.
This clear layer slowly thins out over many years. Once the pattern starts wearing away across the middle of the room, you cannot patch it. You must pull up the old planks and install a fresh floor.
Line up your next job
-
DIY wainscoting a beginner can put up in a weekend
Building DIY wainscoting adds character to a plain room in a single weekend when you follow these simple steps to measure, cut and paint.
-
Hanging peel and stick mirror tiles so they sit flat
Learn how to hang peel and stick mirror tiles on your wall so they sit perfectly flat, align straight and stay put and come down with care.
-
How to regrout tile when the old grout cracks
Learn how to regrout tile by cutting out cracked grout, cleaning the joints and packing in fresh material for a clean finish that lasts.