- Home QZ
- Painting Walls
- 8 steps to painting an interior door without drips
8 steps to painting an interior door without drips
Learn a clear method for painting interior doors without drips or brush marks in eight steps that cover prep work, sequence and drying times.
Guide by Neil Mudgett
7 min of reading
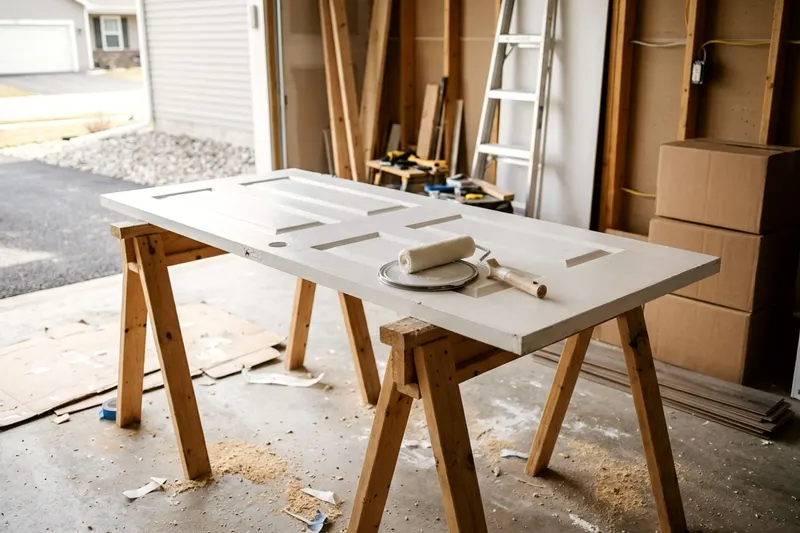
Painting interior doors without drips comes down to thin coats and a set order. Taking the door down and painting the panels in the right order helps give a smooth surface. Let each coat dry fully to get a durable finish.
1. Decide whether to take the door off its hinges
Take the door off its hinges to make painting easier and prevent runs. Gravity pulls wet paint down a standing door. A door laid flat on sawhorses keeps a wet coat from running as easily.
Place the door in a garage or a spare room so it stays out of the way. Building simple sawhorses gives you a strong base for flat painting.
Leaving the door on its hinges saves space. Choose this method if you have no room to lay the door flat. Slide a heavy canvas drop cloth under the door to protect the floor.
Paint applied to a standing door requires thinner coats. A thin coat helps stop paint forming thick drops at the bottom of the panels.
To remove the door, close it and tap the hinge pins up from the bottom. Use a hammer and a simple nail punch to drive the pins out. These are basic tools worth owning for many home repairs.
Pull the top pin first and leave the bottom pin for last. Open the door slightly and lift it off the hinges. Get a helper to lift a solid wood door.
2. Remove or cover the hardware
Take off the doorknob and the strike plate. Removing the hardware gives a cleaner paint edge than covering it with tape. Unscrew the long screws on the inner face of the doorknob.
Pull the front and back handles apart. Take out the latch mechanism resting inside the edge of the door. Keep all the screws and parts in a clear plastic bag.
Leave the hinges in place if they are stuck fast with old paint. Wrap any remaining hardware tightly in blue painter's tape. Press the edges of the tape down hard with a stiff putty knife.
Run a utility knife gently around the metal edge. Peel away the excess tape to leave a perfect mask over the hinge. Tape prevents stray brush strokes from ruining the metal finish.
3. Check an older door for lead paint, then clean and lightly sand
Put on safety glasses before you scrape or sand any old finish, and check that any mask you use is rated for the hazard. The EPA says homes built before 1978 may have lead based paint. If the door may date from before 1978, ask a lead-safe certified professional about testing the paint before you scrape or sand. The EPA advises that if you must sand old paint, wet the area first, sand the minimum area needed and clean up thoroughly.
Clean the door with a damp rag and dish soap to remove hand oils and dirt. Grease can prevent new paint from sticking. Dry the wood completely with a clean cotton towel. Scuff the old finish with medium sandpaper.
You do not need to strip the door back to bare wood. A light sanding knocks down the gloss on the old finish. The new paint needs this rough texture to grip the surface properly. Wipe all the sanding dust away with a sticky tack cloth.
4. Prime bare spots and repairs
Fill deep scratches and dents with a standard wood filler. Smooth patches stop old damage from showing through the new glossy finish. Press the filler deep into the hole with a putty knife. Scrape the excess filler flat against the wood.
Wait for the filler to dry solid. Sand the patch smooth with fine sandpaper. Wipe the fine dust away with your tack cloth.
Prime the bare wood and the patched spots. Primer helps block wood tannins and seal porous fillers. Brush a thin layer of bonding primer over the repairs.
Check the can to confirm a bonding primer suits old oil paint and clear varnish. Wait for the primer to dry completely.
Prime the entire door only when covering a dark color with a light one. Spot priming saves time and keeps the total paint layer thin. Thick layers of paint can cause doors to stick in their frames.
5. Paint a panel door in the right sequence
Paint the molded details inside the panels first. Painting the sections of a door in a strict order catches wet drips before they dry. Panel doors feature raised or recessed squares surrounded by a flat frame.
Brush the paint into the corners with an angled brush. Brush out any heavy paint that gathers in the deep grooves.
Paint the flat center of the panels next. Move to the short vertical pieces running between the panels. These middle sections are called mullions.
Paint the horizontal wood pieces, called rails, across the door. Finish with the long vertical sides running down the left and right edges. Carpenters call these long sides stiles.
Following this specific path blends each wet edge into the next. Brush in the direction of the wood grain to hide your brush marks. Long, steady strokes look best.
6. Roll and tip off a flat door
Use a small foam roller to cover a flat door quickly. Flat doors have no panels or trim to paint around. Pour your paint into a plastic tray and load the roller evenly.
Roll the paint onto the door in vertical strips. Start at the top corner and work your way down to the bottom.
Foam rollers apply an even coat of paint but leave a bumpy texture behind. Smooth this texture out using a technique called tipping off. Hold a clean, dry paintbrush at a low angle. Drag the very tips of the bristles lightly down the wet paint.
Work quickly so the paint stays wet while you tip it off. Drag the brush in one continuous motion from the top edge to the bottom. Wipe your brush on a clean rag after a few passes to remove built up paint. Tipping off mimics a sprayed finish.
7. Check for runs while the paint is wet
Check the corners and the bottom edges of the panels for gathering drops. Paint flows and settles for several minutes after you brush it on. Catch these early runs immediately with a dry brush. Smooth the paint out before a skin forms on the surface.
Temperature affects how fast the paint sets. The manufacturer Benjamin Moore gives an application temperature range of 50 to 90 degrees Fahrenheit for its Advance high gloss paint, which it recommends for doors and trim. Paint applied outside this range may not dry or cure as intended, so check the can for your paint.
Keep the room temperature steady while you work. Turn off ceiling fans and close windows to stop dust blowing into the wet finish.
Leave a half dry drip alone. Touching sticky paint pulls it off the wood and makes a terrible mess. Wait until tomorrow and sand the hard drip flat.
8. Rehang only when the paint is hard
Wait until the paint hardens completely before you rehang the door. Paint feels dry to the touch long before it cures solid. Rehanging a soft door can ruin the fresh paint around the hinges and the doorstop.
Enamel paint takes time to harden completely. Follow the manufacturer directions for your specific paint.
The brand Benjamin Moore lists a dry time of 4 to 6 hours and a recoat time of 16 hours for its Advance high gloss paint. Give the door a second coat only after the full recoat time on your can passes. After the final coat, wait until the paint has hardened as the can directs before you move the door.
Reattach the doorknob and the latch mechanism gently. Lift the door up into the frame. Slide the top hinge pin in first to hold the weight. Tap the remaining pins down firmly with your hammer.
Choosing the right paint finish for doors
Interior doors take heavy wear from dirty hands and vacuum cleaners. High gloss and semi gloss paints usually wipe clean more easily than flat or eggshell paint. Benjamin Moore describes its Advance paint as a waterborne alkyd that cleans up with soap and water.
Glossy paint reflects a lot of light. This reflection can highlight dents and scratches on the wood. Spend extra time filling holes and sanding out drips before you apply a glossy finish. Using a high quality angled brush reduces brush marks in the final sheen.
Flat paint hides dents well but shows marks from your hands more easily. Avoid using flat paint on a door you touch every day. Satin finishes sit between flat and semi gloss. A satin finish can hide minor flaws and still cleans up with a damp sponge.
Keeping a brush wet between coats
Washing brushes out between coats wastes time and sends good paint down the drain. You can keep a brush wet overnight with a simple wrap. Tear off a square of clear kitchen plastic wrap. Lay the wet brush flat on the plastic.
Fold the plastic wrap tightly over the bristles. Squeeze the air out of the package. Wrap a second layer around the metal band holding the bristles. This tight seal helps keep the paint from drying out.
Store the wrapped brush flat on a table in a cool room. Unwrap the brush tomorrow and dip it straight back into your paint tray. Wash the brush thoroughly with warm water and dish soap when the entire job is done.
Line up your next job
-
What to know before painting a popcorn ceiling
Find out what to check before painting a popcorn ceiling, from asbestos and lead tests to a light-touch rolling method that keeps the texture in place.
-
Can you paint over wallpaper or should it come down
You can paint over wallpaper if it is flat and stuck tight to the wall. Learn how to seal the paper, when to strip it and the steps to do both jobs well.
-
How to paint a room in the right order
Learn how to paint a room in the right order, from clearing and prep to the ceiling, walls and trim, so drips never land on a finished surface.