- Home QZ
- Painting Walls
- How to paint a room in the right order
How to paint a room in the right order
Learn how to paint a room in the right order, from clearing and prep to the ceiling, walls and trim, so drips never land on a finished surface.
Guide by Neil Mudgett
7 min of reading
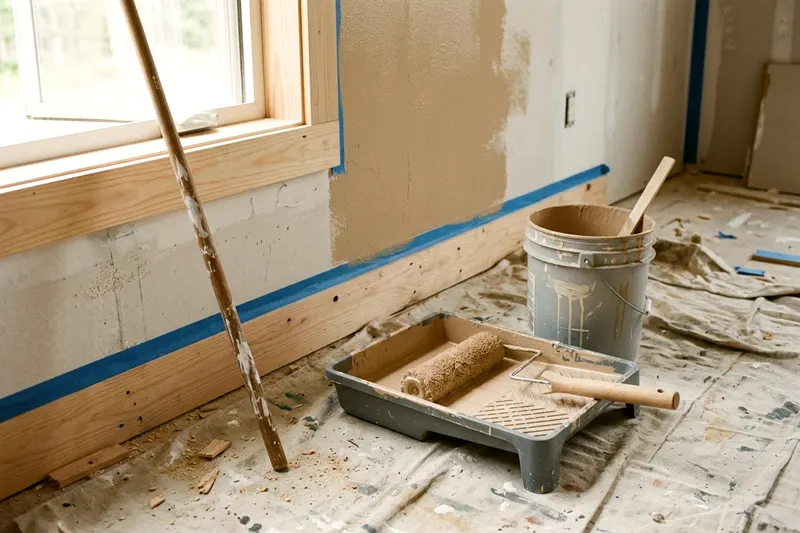
To paint a room without leaving drips on finished surfaces, start at the ceiling and work your way down to the trim. Paint the ceiling first, then cut in the wall edges, roll the walls and paint the baseboards last. Working from top to bottom means any stray paint falls onto unpainted areas where you can wipe it away quickly.
Clear the room and protect the floor
Push all the furniture to the center of the room. You want plenty of walking space around every wall.
Clear these items out of the room before you start:
- Small furniture and floor lamps
- Wall art and picture nails
- Curtains and window blinds
- Light switch plates and outlet covers
Put the small wall plate screws in a plastic bag so they do not get lost. Store the covers and the bag in another room. Removing these plates gives you a cleaner edge than taping around them. Cover the bare switches with painter's tape to keep paint out of the wiring.
Lay canvas drop cloths over the floor and piled furniture, pushing them tight against the baseboards. Canvas stays put when you walk on it and absorbs paint drips, whereas plastic sheeting slides around. Wet paint pools on plastic, sticking to your shoes and leaving footprints through the rest of the house.
Check older walls for lead paint before sanding
Put on a dust mask and safety glasses before you scrape or sand any wall. Safety gear keeps fine dust out of your eyes and lungs.
You must check the age of your house before you prepare the walls. The EPA says homes built before 1978 may have lead based paint. Lead paint can be a health risk when it is disturbed. In 1978 the federal government banned the sale of lead based paint for use in homes.
If your home is older than that, hire a certified lead based paint inspector or risk assessor to test the paint, and assume it contains lead until you know. Stop the job and hire a lead-safe certified contractor if it does. Do not sand or scrape lead paint yourself.
Wash, patch and sand the walls
Paint needs a clean surface to stick properly, so wash the walls with a sponge and warm soapy water. Scrub greasy spots in kitchens with a degreaser. Start washing at the bottom and work up to prevent dirty water streaks, rinsing the sponge frequently. Let the drywall dry completely before moving on.
Walk around the room with a bright work light to look for nail holes and dents. Press lightweight spackle into small holes with a flexible putty knife, scraping the excess flat against the wall. Wait for the spackle to dry completely. Fill deeper holes a second time because the compound shrinks as it hardens.
Sand the patched spots smooth with fine sandpaper. Wrap the sandpaper around a sanding block to keep the surface flat. Run your bare hand over the patch. It is ready when you cannot feel the edge where the patch meets the wall.
The EPA advises that if you must sand old paint, wet the area first, sand the minimum area needed and clean up thoroughly. Wipe away all the sanding dust with a damp rag. If your walls have old paper covering them, read up on whether you can paint over wallpaper or should take it down.
Tape the edges and prime bare spots
Apply painter's tape to anything you do not want to paint, like the top edge of the baseboards. Run long strips along the window frames and door casings. Pull the tape tight and straight, making sure to keep it off the wall itself.
Run a clean putty knife over the edge of the tape. Press it down hard. Sealing the tape edge stops wet paint from bleeding under it. You get a sharp line when you peel it off later.
Prime the spots you patched because bare drywall absorbs liquid faster than painted walls. Paint applied directly over raw spackle leaves a dull spot in the finished sheen. Brush a thin coat of water-based primer over every patch and wait for it to dry.
You do not need to prime the whole room if you are painting over a similar color. You only need a full coat of primer to cover dark paint, heavy stains or raw drywall. A dedicated primer seals the paper surface so your topcoat goes on evenly.
Paint the ceiling first and cut in the walls
Paint the ceiling before you touch the walls. Drips can fall from the ceiling roller onto the upper walls. Painting the ceiling first lets you cover those drips when you paint the walls later. Read what to know about painting a popcorn ceiling if your ceiling has a heavy texture.
Pour your wall paint into a small plastic bucket and dip an angled brush into it. Load only the bottom third of the bristles. Tap the brush against the inside of the bucket. This removes heavy drips without wiping off too much paint.
Hold the brush near the base of the bristles like a large pencil. Brush a wide border of paint along the top of the wall right where it meets the ceiling. This process is called cutting in. A paint roller cannot reach tight corners without bumping the ceiling, so cutting in creates a safe border.
Dip the brush back into the bucket frequently instead of trying to stretch the paint too far. Brushing dry leaves streaks in the finish. Push the brush tip gently into the corner to release the paint, then drag it smoothly along the line.
Cut in the corners of the room from top to bottom, brushing paint along the baseboards and window frames. Keep a wet edge by cutting in one wall at a time. Paint dries quickly, so roll the main part of the wall while the border is still wet.
Roll the walls in sections with a wet edge
Slide a fresh roller cover onto your roller frame. Attach an extension pole to the handle. The pole lets you reach high on the wall without a ladder. It saves your back and speeds up the work.
Pour paint into the deep end of a paint tray. Dip the roller into the paint. Roll it back and forth on the ribbed part of the tray. Do this until the roller cover is fully saturated but not dripping.
Start at one top corner of the wall. Roll the paint onto the wall in a large W shape. Push the roller up and down to fill in the gaps of the W. Roll the paint out evenly.
Pressing too hard leaves thick ridges of paint on the wall. Overlap the wet edge of your cut-in border.
Work in narrow vertical sections, rolling from the ceiling down to the baseboard. Move over and start the next section, always overlapping the wet edge of the previous pass. This wet edge blends the paint together. It prevents visible roller marks when the wall dries.
Finish each vertical section with a light stroke from ceiling to floor. This sweeping motion aligns the stipple texture in the same direction. Roll as close to the ceiling and trim as you can without bumping them. Rolling over the brushed edges blends the textures together for a uniform finish.
Wait for the first coat to dry according to the paint can label, and allow longer in a humid room.
Apply a second coat using the exact same technique. Cut in the edges first, then roll the main wall. Two coats give you true color and a durable surface.
Paint the trim last and pull the tape
Leave the trim for last. Baseboards take a lot of abuse from shoes and vacuums. Trim paint needs a tough finish to resist chips. Semi-gloss or satin paint is a common choice for this reason.
Scuff the old trim lightly with fine sandpaper before you paint, wetting it first in a home built before 1978 as the EPA advises. This removes the glossy surface and helps the new paint stick. Wipe the dust away with a damp cloth. Apply the trim paint with a clean angled brush.
Paint the window frames and door casings first, working your way through painting an interior door if that is part of your project. Paint the baseboards last, brushing the paint on in long, smooth strokes. Watch out for thick drips pooling in the lower corners.
Pull the painter's tape off the baseboards and trim before the final coat dries completely. Wait a short while after painting. The paint should feel slightly tacky but not wet.
Grab one end of the tape. Pull it back on itself at a sharp angle. Pulling slowly slices the thin film of paint bridging the tape and the wall. This leaves a crisp, straight line.
Letting the paint dry completely before pulling the tape causes problems. Dry paint forms a solid skin over the seam. Pulling the tape then will tear chunks of fresh paint off your wall.
Use a utility knife if the paint does dry too much. Lightly score the edge of the tape where it meets the wall. Run the blade along the seam to cut the paint film. Pull the tape away slowly.
Wash your brushes and rollers in warm soapy water immediately. Let them dry flat. Pack away the drop cloths and move the furniture back into place once the walls are fully dry.
Line up your next job
-
What to know before painting a popcorn ceiling
Find out what to check before painting a popcorn ceiling, from asbestos and lead tests to a light-touch rolling method that keeps the texture in place.
-
8 steps to painting an interior door without drips
Learn a clear method for painting interior doors without drips or brush marks in eight steps that cover prep work, sequence and drying times.
-
Can you paint over wallpaper or should it come down
You can paint over wallpaper if it is flat and stuck tight to the wall. Learn how to seal the paper, when to strip it and the steps to do both jobs well.