- Home QZ
- Laying Floors
- 9 tips for peel and stick floor tile that stays down
9 tips for peel and stick floor tile that stays down
A proper prep routine and heavy rolling keep your peel and stick floor tile flat and help stop the corners from lifting after you finish the room.
Guide by Nora Mattingly
7 min of reading
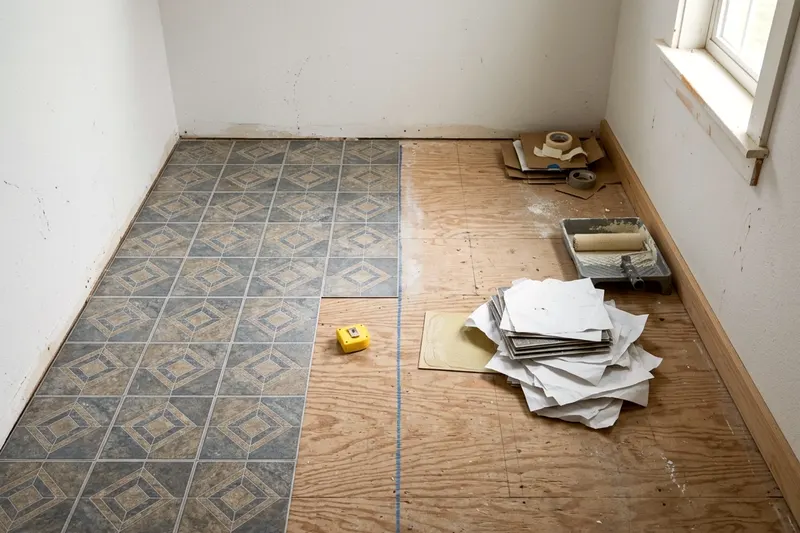
Peel and stick floor tile can lift at the corners when the adhesive hits a dirty spot or the room gets too cold. You keep a peel and stick vinyl tile flat by cleaning the base floor thoroughly and rolling the finished room with heavy weight. A solid prep routine gives the tiles the best chance of a tight bond.
1. Let the tiles sit in the room first
Bring your boxes of tile into the room before you do any prep work. Vinyl expands and contracts with temperature shifts. You want the tiles to settle at the room's normal temperature before you stick them down.
Brewster says to let the tiles acclimate for 48 hours at a room temperature of at least 65 degrees Fahrenheit. Lay each package flat and spread them out across the floor.
The room must stay comfortable while the floor settles. Brewster says not to apply the tiles where the temperature regularly falls below 55 or rises above 85 degrees Fahrenheit. Outside that range the tiles may not bond well.
Heat can make the tiles expand and lift. Maintain a steady climate in the house.
2. Check the floor you are sticking to
The adhesive on the back of your tile requires a flat and stable base. Brewster says not to apply them over loose, uneven or heavily textured flooring or over radiant heated floors. Rough surfaces can give the adhesive less to grab.
A sheet vinyl floor may work as a base if it sits flat and has no deep texture. Laying over an old floor saves time. You must fix any peeling edges first. Check the tile maker's instructions about primer on bare plywood.
Concrete needs a moisture check. Brewster says to avoid concrete with excessive moisture or alkalinity and to use a primer adhesive over concrete. Ask the tile maker or a flooring pro how to test yours.
Older houses might have vinyl squares from decades past. Do not scrape up old adhesive or damaged tiles if you suspect a hazard. You must find out if your old floor tiles contain asbestos before you disturb them.
If they might, leave them alone and ask an accredited asbestos professional about your options before covering or removing them.
3. Clean, dry and prime where needed
Dirt and grease are common reasons stick on floor tiles fail. Sweep the entire room twice to pick up loose dust. Use a vacuum to clear out the corners and the edges along the baseboards. Remove any dried paint drops with a putty knife.
Scrub the floor with a degreasing cleaner. Kitchen floors can hold invisible grease splatters that keep tile adhesive from bonding. Bathroom floors accumulate soap scum and hairspray.
Wash the surface thoroughly with a stiff brush. Rinse the floor with clean water. You need a clean, smooth, flat and dry surface for the glue.
Let the floor dry completely. Trapped moisture can hurt the bond. Wait longer if you washed a porous surface like concrete or unsealed wood.
Brewster says a primer adhesive is necessary over concrete, so apply one there and let it dry too. Check the tile maker's instructions for other porous floors.
4. Snap center lines and start in the middle
Rooms are rarely perfectly square. You will end up with crooked rows if you start laying tile against one wall. You avoid this by finding the center of the room and working outward. This pushes the angled cuts to the edges where nobody notices them.
Measure the length of two opposite walls. Mark the center point of each wall. Stretch a chalk line between these two marks and snap it.
Do the exact same thing for the other two walls. You now have a cross in the middle of your floor. Check the cross with a framing square.
Lay your first tile perfectly aligned in one corner of that cross. Peel the paper backing off. Hold the tile by the edges and hover it over the lines.
Lower it gently into place. Press it down once you know it sits square on the lines. Do not press hard until you check the alignment.
5. Press tiles tight against each other
Your second tile goes right next to the first one. Peel the backing off the second tile. Butt the new tile tightly against the first tile before you lower it. Do not trap dirt between the edges.
You want zero gap between the pieces. A gap can trap dirt and let water seep under the floor. Slide the new tile down the edge of the old one until it hits the floor.
Drop the rest of the tile and press it down. The tiles should touch along their entire length.
Work outward in a staircase pattern. Build a block of tiles around the center cross. This keeps the grid straight. Run your hand over the seams as you work.
The transition should feel smooth. Pull a tile up immediately if it sits crooked. A crooked tile ruins the alignment of the entire room.
6. Cut edge tiles with a utility knife
You will reach the walls and need to cut tiles to fit. Put on your safety glasses and heavy work gloves. You need a sharp utility knife, a metal straightedge and a pencil.
A good knife is one of the basic tools worth owning before you start. Change your blade frequently. A dull blade slips and tears the vinyl.
Place a full tile exactly on top of the last full tile in the row. Take a third tile and push it against the wall. Let it overlap the loose tile.
Draw a pencil line on the loose tile where the top tile ends. This marks your cut line perfectly.
Place the marked tile on a scrap piece of wood. Put your metal straightedge along the pencil line. Score the tile firmly with your utility knife.
You do not need to cut all the way through. Bend the tile along the score line until it snaps. Cut the paper backing to separate the pieces.
7. Roll the whole floor firmly
Brewster says to roll the entire floor to strengthen the bond between the tile and the floor. Walking on it may not give the same even pressure. You need a heavy tool designed for the job. Do not skip this step.
Rent or borrow a floor roller. Brewster recommends rolling the installed floor with a 75 to 100 lb roller. The weight presses the tiles down firmly.
Start in one corner of the room. Push the roller back and forth across the tiles. Overlap your passes slightly.
Roll the entire floor in one direction. Turn 90 degrees and roll the whole room again. A second pass helps press the edges down.
8. Leave room for expansion at the walls
Vinyl floor tiles expand when the weather gets warm. Tiles can lift if they have nowhere to go, and Brewster says tiles laid snug against the wall can lift as they expand. Leave a small gap around the perimeter of the room.
Keep your cut tiles a small gap away from the wall. This expansion gap gives the floor room to move. Measure the gap occasionally as you work down the wall.
Leave this gap empty.
You cover this gap with baseboard or shoe molding. Nail the molding to the wall, not to the floor. Drive the nails slightly above the tile surface.
The floor must be able to slide slightly under the trim. This simple step helps stop tiles from lifting in warm weather.
9. Wait before washing the floor
The adhesive needs time to cure and reach its maximum strength. Keep the floor dry and stay off it as much as you can for the first five days after you lay it.
Brewster says to wait 5 days after application before cleaning the tiles. Sweeping with a dry broom is fine. Do not use a wet mop or any liquid cleaners during this window.
Give it the full five days.
Once the waiting period passes, use a vinyl floor cleaner. Brewster says not to clean with detergents, soaps, harsh chemicals, bleach, one-step cleaners, wax or an excessive amount of water.
Wipe up spills right away to protect your new floor.
How to fix a loose peel and stick tile
Sometimes a single corner lifts even after a good installation. You can stick it back down without replacing the whole piece. Catch the problem early before dirt gets stuck to the exposed adhesive.
Heat the lifted tile with a hair dryer on a medium setting. Hold the dryer a few inches away. Move it constantly so you do not melt the vinyl.
The heat may soften the adhesive and make the tile more flexible. Wait a few minutes for the glue to warm up.
Lift the corner slightly and blow away any dust. Press the hot tile firmly back into place. Place a stack of heavy books over the corner and leave them there overnight. The weight holds the tile flat while the adhesive cools and sets.
If the factory glue is ruined, check with the tile maker before using any other adhesive, because Brewster says not to use additional adhesives. Replace the tile if it will not stay down.
Press the tile down and weight it with books overnight.
Line up your next job
-
Could your old floor tiles contain asbestos
Asbestos tiles can hide under old carpet in older homes. Learn where they turn up, why an accredited pro should take samples and what your options are.
-
Does laminate flooring need underlayment
Find out when you need a separate laminate flooring underlayment to protect your planks and when a concrete subfloor demands a plastic vapor barrier.
-
Laying vinyl plank flooring over an old floor
Learn the steps for a successful vinyl plank flooring installation over your existing floor including how to prep the surface and lock the boards in place.