- Home QZ
- Laying Floors
- Does laminate flooring need underlayment
Does laminate flooring need underlayment
Find out when you need a separate laminate flooring underlayment to protect your planks and when a concrete subfloor demands a plastic vapor barrier.
Guide by Nora Mattingly
8 min of reading
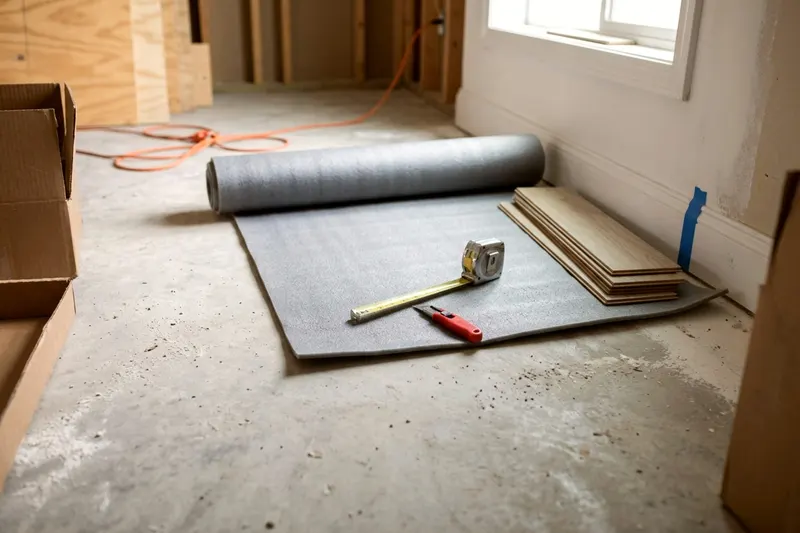
Laminate planks without an attached pad need a single layer of separate underlayment, and planks with a pad do not. Over a concrete subfloor, Mohawk's instructions call for a vapor barrier.
What laminate underlayment does under a floating floor
Laminate planks snap together to form one large sheet. This is called a floating floor. The planks do not nail down to the subfloor below. They just rest on top of it.
This large floating sheet needs a cushion. Underlayment provides that necessary soft layer. It sits between the hard subfloor and the rigid laminate planks.
A wood subfloor is never completely smooth. Sheets of plywood or oriented strand board meet at rough seams. Sometimes the wood swells slightly at the edges. Tiny gaps and dips cover the surface.
Laminate underlayment bridges these small gaps. The foam compresses over the high spots and fills in the low spots. The floor above sits flatter, though a very uneven subfloor still needs leveling.
The foam also stops the planks from scraping against the wood subfloor. Laminate makes a loud clicking noise if it hits a hard surface. The underlayment absorbs the impact of your shoes. The foam deadens the sound and makes the room quieter.
Finally, the thin foam gives the floor room to flex. As you walk across the room, the floating floor bends slightly under your weight. The underlayment allows the planks to move without stressing the joints.
Planks with an attached pad versus plain planks
Laminate flooring comes in two styles. You can buy plain planks, or you can buy planks with an attached pad. Check the bottom of a plank before you buy any supplies.
Planks with an attached pad have a layer of thin foam glued directly to the bottom. These planks may be ready to install over a wood subfloor, so check the instructions.
Check the instructions before you add another layer of foam under these planks. Do not stack padding without checking first. Too much padding can make a floor bounce.
A bouncy floor can strain the joints. The thin tongue and groove edges can snap off, and the planks can pull apart and leave gaps.
Plain planks have a hard surface on the bottom. These planks require a separate foam underlayment for laminate flooring. Mohawk says planks without attached underlayment should go over a single layer of underlayment suited to its laminate.
Buy an underlayment suited to your laminate, as Mohawk puts it. Do not use carpet padding unless the plank maker approves it.
Why concrete subfloors need a vapor barrier
Concrete subfloors can hold moisture. A slab on the ground can pull water up from the soil.
The concrete releases this moisture into the room as water vapor. You cannot always feel the dampness, and Mohawk strongly recommends a moisture test of the subfloor.
Laminate planks have a core made of compressed wood fibers. This core acts like a sponge too. If water vapor rises out of the concrete, the laminate core will absorb it.
The edges of the planks can swell up and the floor can buckle and warp. A swollen core may not shrink back, and you may have to tear the floor out and start over.
A vapor barrier for laminate flooring helps prevent this. The barrier is a sheet of plastic that goes directly on the concrete. It slows the moisture before it reaches the floor above.
Some underlayment rolls come with a moisture barrier built in. Check that the roll is made for use over concrete and that your plank maker allows it.
If your planks have an attached pad, you just buy a roll of plain plastic. Lay the plastic over the concrete. Lay the padded planks over the plastic.
New concrete needs time to dry before you cover it. A fresh slab holds a massive amount of water. Wait for the concrete to cure and dry before laying the plastic sheet. Follow the drying times listed on the concrete bag, and test the slab for moisture.
Basements and other damp spots
Treat a concrete basement floor as a concrete subfloor, which Mohawk says needs a vapor barrier. Mohawk also strongly recommends a moisture test and says its laminate should not go in rooms with floor drains or sump pumps.
Many older homes have old vinyl sheets or square tiles glued to the basement floor. The old glue can be tough to remove, and leaving the old floor in place may give you a smoother surface.
Leaving old tiles in place can also avoid exposing you to hidden dangers. Old floor tiles and mastic glue may contain asbestos, so have a licensed pro test them before you disturb them. Mohawk's instructions say not to remove old flooring unless it is asbestos free.
You can read more about how to identify old tiles before you start scraping. If you leave the old floor intact, you may avoid stirring up harmful dust.
Even with old vinyl in place, you still treat the basement like bare concrete. Old vinyl seams can let moisture through, so lay a plastic vapor barrier over the old flooring as Mohawk calls for over concrete.
Check the subfloor in rooms built over a crawl space. Moisture from a damp crawl space can reach the wood above, so check your plank maker's instructions for rooms built over one.
Preparing the room for the underlayment
Before you unroll anything, you must clean the subfloor. A dirty subfloor will ruin a floating floor. Gather these tools before you start preparing the surface:
- Safety glasses and heavy leather work gloves for handling sharp tools
- A sharp utility knife to slice the foam rolls
- A metal floor scraper to knock down old joint compound
- A shop vacuum to pull dirt out of the corners
- Underlayment tape to seal the plain foam seams
Put on your safety glasses and gloves before you pick up the scraper. Take the metal scraper and walk the room. Scrape away any chunks of dried drywall mud. Knock down any high spots on the wood seams.
Pull up any old staples or carpet tacks left behind. Sweep the floor thoroughly. Then sweep it a second time. Finally, use the shop vacuum to pull dust away from the baseboards.
Any small pebble left on the subfloor will cause problems. The hard laminate plank will rub against the pebble every time you walk by. The floor will crunch and squeak. Eventually, the pebble will wear a hole in the underlayment.
Check the floor for large dips. Lay a straight piece of lumber across the floor. Look for gaps under the board. If the floor dips noticeably, use a self-leveling compound to flatten the subfloor.
How to lay and tape underlayment seams
Bring your tools and your underlayment rolls into the room. Start at the longest straight wall. Unroll the first strip of underlayment. Push the edge of the roll tight against the drywall.
Roll it all the way to the opposite wall. Cut the end from the roll using your utility knife. Smooth the material out so it sits flat against the subfloor. Now grab the roll and start the second row.
If you are laying a plain foam pad over wood, butt the edges together unless the roll's instructions say otherwise. Do not let the foam overlap. Overlapping the foam creates a thick ridge. The laminate planks will rock back and forth over this ridge.
Push the foam edges together tightly and tape the seam with underlayment tape. Use the tape the underlayment maker recommends.
If you are laying a plastic vapor barrier over concrete, the rules change entirely. A butt joint can let moisture through, so overlap the plastic sheets.
Mohawk's laminate instructions say to install a vapor barrier over concrete subfloors with seams overlapped 8 inches or more. Pull the second plastic sheet over the first one until you reach that mark.
Tape the overlapped seams if the barrier maker says to. The plastic sheet should cover the whole floor, and the barrier maker's instructions say how to treat the room edges.
You can review the steps to install laminate flooring once your base layers are flat and taped.
Handling doorways and tight corners
Rooms are rarely perfect squares. You will need to cut the underlayment to fit around door frames and closet tracks. Roll the foam flat against the obstacle.
Take your utility knife and carefully trim the foam to match the shape. Do not leave large gaps around the edges. The laminate planks need continuous support.
If you cut the foam too short, cut a small patch from the scrap pile. Push the patch into the gap and tape the seams. The repair should hold under the floor.
Mistakes that can cause trouble with a warranty
Skipping the vapor barrier over concrete goes against Mohawk's instructions. The floor might look fine at first, but moisture can rise, the edges can swell and the floor can warp.
Mohawk says acceptable subfloor moisture conditions must be maintained for the life of the floor, so read your warranty and follow the instructions.
Doubling up the underlayment can also cause warranty trouble, so check yours first. People often think more padding means a better floor. They lay a thick foam roll down, then install planks with a pre-attached pad on top.
The floor can flex too much and the locking joints can snap off, and a warranty may not cover joints broken by extra padding.
Using the wrong underlayment can cause failures. Use the type your plank maker names, not rubber mats or carpet pads.
Leaving debris on the subfloor ruins the installation. A floating floor needs a smooth surface to glide across. Dirt, old staples and globs of paint trap the planks.
The floor cannot expand and contract normally. The planks will pull apart and leave ugly gaps. If your floor already shows gaps, review tips for fixing common laminate floor problems before tearing anything up.
Line up your next job
-
Could your old floor tiles contain asbestos
Asbestos tiles can hide under old carpet in older homes. Learn where they turn up, why an accredited pro should take samples and what your options are.
-
9 tips for peel and stick floor tile that stays down
A proper prep routine and heavy rolling keep your peel and stick floor tile flat and help stop the corners from lifting after you finish the room.
-
Laying vinyl plank flooring over an old floor
Learn the steps for a successful vinyl plank flooring installation over your existing floor including how to prep the surface and lock the boards in place.