- Home QZ
- Laying Floors
- How to install laminate flooring in one room
How to install laminate flooring in one room
Your first laminate flooring installation in one room requires a flat subfloor, a good layout plan and a few tools to keep the boards straight.
Guide by Nora Mattingly
7 min of reading
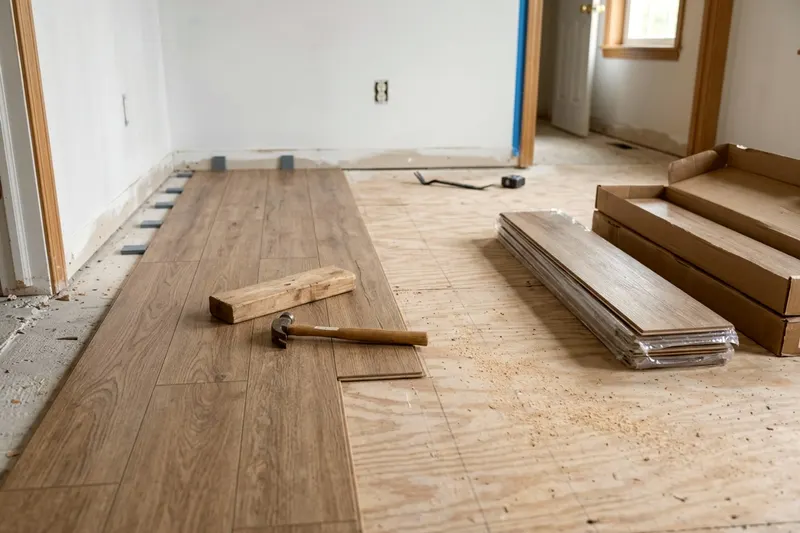
Your first laminate flooring installation starts with the subfloor. Pull the baseboards and sweep up the dust first. You need a flat surface and a clear expansion gap around the edges. This gap lets the floating floor expand and contract without buckling.
Prep the subfloor for a flat finish
Start by clearing out the bedroom completely. Sweep the floor thoroughly. Any small pebble or stray staple left behind will create a hard bump under your new floor.
Find out if your laminate flooring needs underlayment or if it has a foam pad attached to the back. Bare subfloors often have bumps and dips that can strain the locking joints. Lay a long straight edge across the floor. Mohawk's laminate instructions say the subfloor should have no more than 3/16-inch of unevenness per 10-foot span.
Mark any high spots with a pencil. Sand plywood seams down with heavy grit sandpaper. Grind down concrete humps with an angle grinder. Fill low spots with a floor leveling compound.
Pour the compound into the dips and feather the edges smooth with a trowel. Wait for the compound to dry completely. Mohawk strongly recommends a moisture test of the subfloor, and it calls for a vapor barrier only over concrete.
Acclimate the planks to the room climate
Wood and laminate products can expand and contract with the weather. Bring the closed boxes of flooring into the room. Let them sit in the center of the room to adjust, for as long as the flooring instructions say.
Do not open the boxes until you are ready to start. Mohawk says its laminate suits climate controlled indoor rooms at 35 to 65 percent relative humidity and 60 to 85 degrees Fahrenheit.
Running the air conditioning or the heat helps stabilize the room. Keep the room within this temperature range during the job and after the floor is down.
Remove the baseboard and undercut the door frames
You must pull the baseboards before the floor goes down. Cut the line of caulk at the top of the baseboard with a utility knife. This stops the wall paint from tearing.
Push a stiff putty knife behind the baseboard. Pry the wood off the wall gently to save it for later. Pull any remaining nails from the drywall with pliers.
Undercutting the door frames hides the raw edge of the flooring. Put on safety glasses and hearing protection before you pick up a saw. Place a piece of your underlayment and a scrap piece of laminate against the door jamb.
Rest an oscillating multi-tool or a hand saw flat on the laminate scrap and cut straight through the wooden door frame. Pull the cut piece of wood out of the frame. Vacuum the sawdust out of the corners. The new floor will slide right under the door frame.
Plan the room layout
A good layout prevents narrow pieces of flooring at the walls. Measure the bedroom width in inches. Divide that total by the width of one laminate plank. The decimal left over represents the width of your final row.
A narrow final row can be tough to install and may split. Cut the first row down by a few inches to widen the last row.
Measure the room length next. Mohawk's instructions call for a 3/8-inch expansion space on all sides of the floor. You must subtract this gap from your total room measurements before you calculate the planks.
Plan your end cuts to avoid tiny pieces. Mohawk says the first piece in a row must be at least 8 inches long. Plan your cuts so you do not finish a row with a short sliver. A short piece at the end of a row can cause trouble later.
Set up the first row against the wall
Start at the longest unbroken wall. Place 3/8-inch plastic spacers against the drywall and set the first plank flat on the floor. Push it up against the spacers. Keep the tongue side facing the wall and the groove side facing the room.
Along straight walls, cut the tongue off the long edge of the first row, as Mohawk's instructions say. This gives you a flat edge against the wall spacers.
Place the second plank end to end with the first. Angle the short end of the second plank into the first plank and press down until the joint clicks shut. Continue this process down the wall. Ensure the planks stay tight against the spacers.
Cut the planks safely and accurately
You will need to cut the final plank of the first row to length. Measure the remaining gap. Subtract 3/8-inch for the wall expansion gap.
Mark the cut line on the back of the plank with a speed square. Put on your safety glasses. Make a straight cut with a circular saw to fit the last piece in the row.
Cut the plank face down with a circular saw or a jigsaw. If you use a miter saw or a hand saw, cut the plank face up. This helps keep the saw blade teeth from chipping the decorative top layer. Place the cut plank at the end of the row and lock it in.
Click the rows in and stagger the end joints
Start the second row with the leftover piece from your first row cut. Check each plank for chipped corners or broken locking tracks before you install it. Set aside any damaged boards to use for edge cuts later.
Mohawk specifies that end joints should be offset by at least 12 inches from the row beside it. This offset helps tie the boards together. Avoid a repeating stair-step pattern. Mix up the plank lengths to create a random, natural look.
Angle the long edge of the new plank into the previous row and push it in tight. Drop the plank flat to the subfloor so the locking system snaps together. Hold a tapping block against the plank edge and tap it lightly with a mallet to close tiny gaps. Never hit the laminate directly with a hammer.
Fit the next plank by angling the short end into the previous plank and drop it down flat. Lift the outside edge of the plank slightly to push the plank into the long edge of the first row. Drop it flat to the floor. Tap the joints tight with the block and mallet.
Keep adding rows across the bedroom. Move your spacers along the walls to keep the 3/8-inch expansion gap consistent. Keep checking the joints for small gaps and read up on laminate floor problems you can fix if your rows start to drift. A tiny gap in row two can cause alignment problems later.
Scribe and rip the final row
The final row rarely fits perfectly. You will need to rip the planks lengthwise to fit the remaining space. Place a full plank directly on top of the previous row. Push a scrap piece of laminate against the wall spacers.
Trace the edge of the scrap piece along the full plank with a pencil. This scribes the exact wall profile onto the plank. Cut the plank along your pencil mark with a table saw or a jigsaw.
Angle the cut piece into the previous row. A pull bar is a good tool for this step. Hook one end of the pull bar over the outer edge of the laminate. Tap the other end with a mallet.
This pulls the last row tight against the rest of the floor. Check that the expansion gap remains open. The pull bar provides the force you need in a tight space where a tapping block will not fit.
Finish the doorway and reinstall the baseboard
The raw edges of the floating floor need cover to look finished. Remove all the plastic spacers from the walls and sweep up any remaining dust from the edges. Do not skip pulling the spacers. Leaving them in can trap the floor and make the planks buckle.
Reattach the baseboards around the room perimeter. Drive trim nails through the baseboard into the wall studs. Never nail the baseboard into the floor. The laminate must remain free to move under the wood trim.
If the baseboard does not cover the expansion gap entirely, add a piece of quarter round shoe molding. Nail the shoe molding to the baseboard, not to the floor.
Cover the doorway gap with a transition strip. Mohawk requires T moldings in doorways narrower than 32 inches or where the floor changes direction through the doorway, and in rooms 50 feet or longer in length or width.
Follow the molding maker's instructions to cut and fasten the track, and keep the laminate itself free to move. Press the T molding down into the track until it sits flush with the laminate. Caulk the top edge of the baseboards to finish the job.
Line up your next job
-
Could your old floor tiles contain asbestos
Asbestos tiles can hide under old carpet in older homes. Learn where they turn up, why an accredited pro should take samples and what your options are.
-
9 tips for peel and stick floor tile that stays down
A proper prep routine and heavy rolling keep your peel and stick floor tile flat and help stop the corners from lifting after you finish the room.
-
Does laminate flooring need underlayment
Find out when you need a separate laminate flooring underlayment to protect your planks and when a concrete subfloor demands a plastic vapor barrier.