- Home QZ
- Painting Walls
- How to paint wood so the paint does not peel
How to paint wood so the paint does not peel
Knowing how to paint wood so the finish lasts requires careful preparation, from checking for lead to sanding, priming, and applying two thin coats.
Guide by Neil Mudgett
7 min of reading
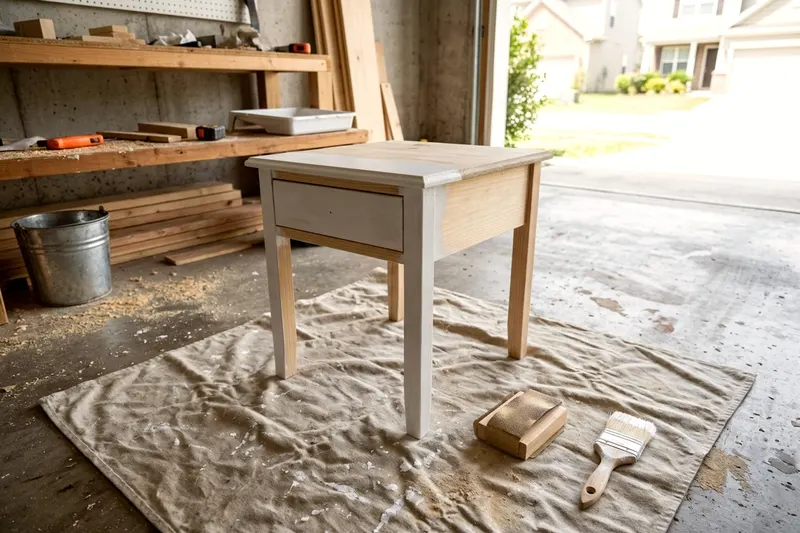
Wood needs a clean, scuffed surface and a coat of primer before the final color goes on. You wash away grease, scuff the old finish with sandpaper, and seal the bare patches so the new paint sticks flat and hard.
Set up a flat workspace and protect the floor
Move your wood piece to a well-lit room with good air flow. Painting indoors protects the wet finish from bugs and blowing dust.
Spread a heavy canvas drop cloth over the floor. Canvas absorbs paint drips so you do not track wet spots through the house on your shoes. Plastic sheets stay wet and slippery.
Raise your project off the floor to save your back. You can build simple sawhorses to hold flat shelves or long trim boards. Lay a piece of scrap wood under furniture legs. Lifting the legs off the drop cloth stops the wet paint from gluing the chair to the canvas.
Check for old lead paint before you sand anything
Older wood trim and painted furniture may carry a specific health risk. In 1978 the federal government banned the sale of lead based paint for use in homes. The EPA says homes built before 1978 may have lead based paint.
The EPA says about three quarters of US homes built before 1978 still contain some lead based paint. If the piece or trim may date from before 1978, ask a lead-safe certified professional about testing the paint before you work on it.
Do not cut into or scrape suspect paint to test it yourself. A lead-safe certified professional can tell you how to check old paint on trim or furniture that may predate 1978.
Leave lead paint removal to a lead-safe certified professional. The EPA advises that if you must sand old paint, wet the area first, sand the minimum area needed and clean up thoroughly. Dampening the surface helps keep the toxic dust from floating into the air.
Clean the surface to remove grease
Paint often peels when grease and hand oils block it from grabbing the wood. Kitchen cabinets and dining chairs pick up a heavy layer of cooking grime.
Fill a bucket with warm water and a liquid degreasing soap. Dip a coarse sponge into the bucket and squeeze out the excess water. Scrub the wood from top to bottom. Pay close attention to the areas around handles and edges where people touch the piece most.
Rinse the sponge in clean water. Wipe the soapy residue off the wood. Let the piece sit until the surface feels completely dry. Water trapped under paint can cause the finish to bubble and flake later.
Sand the wood so the paint can grip
Skip dry sanding on old paint that may contain lead until a pro has checked it, and put on a dust mask and safety glasses before you make the first pass. Sanding removes the glossy sheen from old paint and opens the pores of bare wood.
Sanding by hand gives you control over curves and tight corners. Wrap a sheet of medium sandpaper around a rubber sanding block. A block spreads your hand pressure evenly so you do not dig grooves into flat surfaces.
Rub the block back and forth in the direction of the wood grain. The grain is the pattern of lines running along the board. Going against the grain leaves deep cross scratches that show through the final paint job.
Apply firm downward pressure. You want to knock off loose flakes and cover the entire piece in fine scratches. The new primer needs these scratches to lock onto the surface.
Fold a loose piece of sandpaper in half to reach into tight corners and carved details. Crease the fold sharply. Press the creased edge into the grooves to scuff the old finish.
Clear the sanding dust away before you move on. Vacuum the wood with a soft brush attachment. Wipe the remaining powder off with a tack cloth. A tack cloth is a piece of sticky cheesecloth that grabs fine particles without leaving a wet residue behind.
Fill dents and knots and sand again
Bare wood and old painted pieces often have deep gouges or empty screw holes. Press wood filler into these gaps with a flexible metal putty knife. Wood filler is a thick paste that dries hard.
Push the filler firmly into the hole. Drag the flat edge of the putty knife across the top to scrape away the excess. Leave a slight mound over the hole because the paste shrinks slightly as it dries.
Wait for the filler to turn hard and pale. Read the side of the tub for the exact drying time. Thick patches take longer to cure.
Swap your sandpaper for a fine sheet on your sanding block. Rub the dried patches flat and run your bare fingers over the repair. The patch is ready when you cannot feel a bump or a dip. Wipe away the new white dust with your tack cloth.
Tape off the edges you want to keep clean
Apply blue painter tape to the wall if you are painting baseboards. Press the tape along the floor edge to protect the carpet or the hard floor.
Run a flexible putty knife over the edge of the tape. This seals the tape down hard so wet paint cannot bleed underneath it.
Remove the tape while the second coat of paint is still slightly wet. Pulling the tape up slowly at a sharp angle cuts the paint film cleanly. If you wait for the paint to dry completely, the tape can rip chunks of the new finish off the wood.
Choose a primer that suits the wood
Primer acts as the glue between the wood and the colored paint. Bare wood acts like a sponge and soaks up primer to seal the grain. Painted wood needs a bonding primer to stick fast to the old scuffed finish.
Check your bare wood piece for dark knots. Pine knots can bleed yellow sap through regular water-based coatings. Buy a shellac-based primer or an oil-based primer to cover pine. These primers are made to block sap stains, so follow the label for ventilation and safety.
Latex primer works well for most other indoor projects like basic shelves or putting up wainscoting. It usually smells milder than oil-based primer and washes out of your brushes with warm soap and water.
Pry the lid off the primer can with a flathead screwdriver. Stir the liquid slowly with a wooden stick. The heavy solid ingredients settle at the bottom of the can while it sits on the store shelf. Scrape the stick across the bottom until the primer looks smooth and even.
Pour a small amount of primer into a plastic paint tray. You only need enough to coat the bottom of the tray.
Brush or roll thin coats and keep a wet edge
An angled brush paints trim, chair legs, and inner corners. A small foam roller handles flat shelves and table tops smoothly. Paint the recessed details first and leave the large flat areas for last, matching the logic of painting a room.
Dip the brush bristles into the primer halfway. Tap the metal band of the brush against the inside edge of the can. This drops the heavy excess liquid back into the tin.
Brush the primer onto the wood in long straight strokes. Follow the direction of the wood grain. Do not worry if the primer coat looks thin or patchy. Its only job is to stick to the wood and provide a flat base.
Wait for the primer to dry. Read the back of the can for the recoat time. Sand the dry primer very lightly with fine sandpaper. Apply almost no downward pressure.
This gentle pass knocks down tiny dust bumps and raised brush marks. Wipe the dust away with your tack cloth.
Open and stir your interior paint. Paint the first color coat exactly like the primer. Work in small sections.
Keep a wet edge as you move across the wood. This means you always brush fresh paint into paint that is still wet. If you brush over half-dry paint, the bristles drag the sticky finish and leave thick marks. Work steadily from one side of the piece to the other.
Wait for the first coat of paint to dry completely. Apply a second thin coat. Two thin coats usually form a harder, smoother finish than one thick coat.
Let it dry fully before you use it
Paint often feels dry to the touch well before it is ready. It is not ready to handle heavy objects yet.
Latex paint takes much longer to cure fully than to feel dry, so check the can for the cure time. Curing is the invisible chemical process that makes the paint hard and resistant to scratching.
Leave your painted chair or shelf in a warm, dry room while it cures. Cold air and high humidity can slow the chemical reaction down.
If you put heavy books on a painted shelf too early, the books can stick to the soft paint. The paint can tear off the wood when you try to move them later.
Test an unseen corner with your fingernail once the cure time on the can has passed. Press your nail gently into the finish. The piece is ready to use if the paint feels solid and your nail leaves no indent.
Line up your next job
-
What to know before painting a popcorn ceiling
Find out what to check before painting a popcorn ceiling, from asbestos and lead tests to a light-touch rolling method that keeps the texture in place.
-
8 steps to painting an interior door without drips
Learn a clear method for painting interior doors without drips or brush marks in eight steps that cover prep work, sequence and drying times.
-
Can you paint over wallpaper or should it come down
You can paint over wallpaper if it is flat and stuck tight to the wall. Learn how to seal the paper, when to strip it and the steps to do both jobs well.